
Activity 1: Image Recognition
Train and Test the Image Classifier


The first step is to open Google Teachable Machine in order to create an image recognition model.
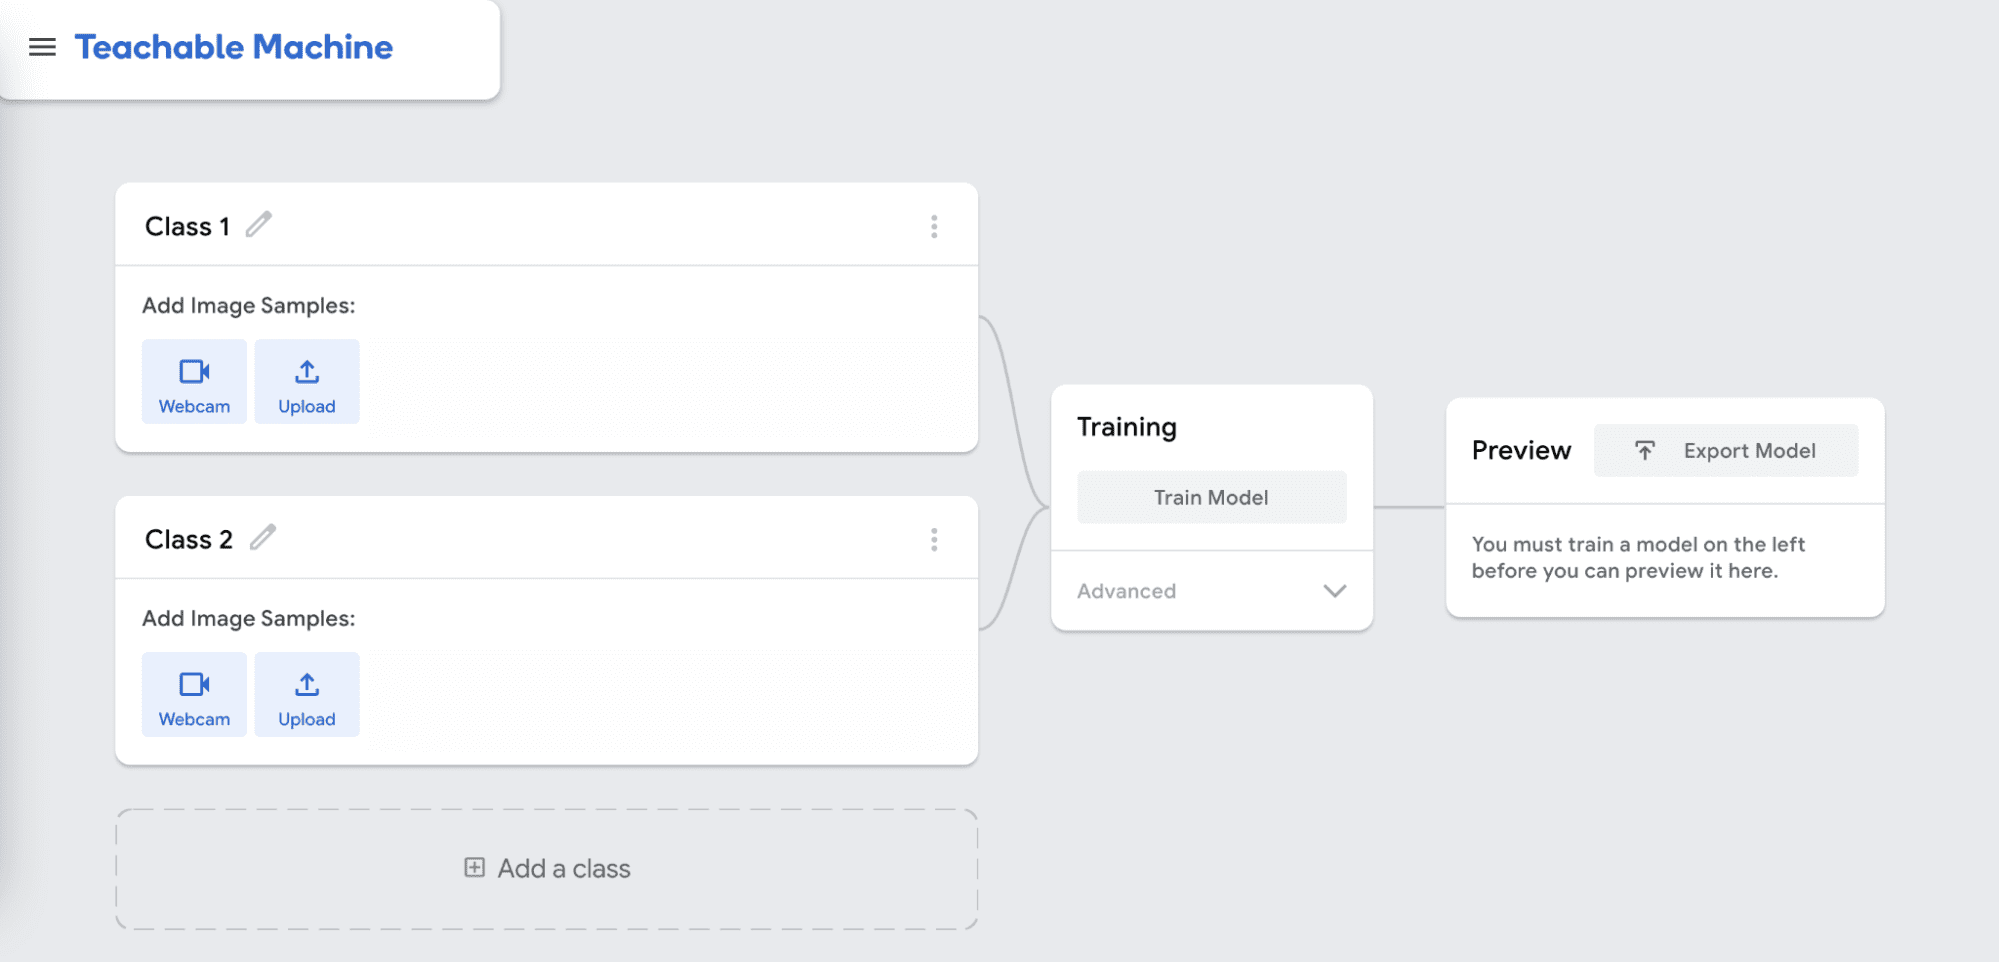
Decide how many categories, or classes, you want and name them. Then use the webcam to take pictures for each class. For example, you might take pictures of you and your partner, or you with and without a stuffed animal. Aim for about 300 pictures for each class (this only takes a few seconds) and try to move around slightly so the camera gets a variety of angles.
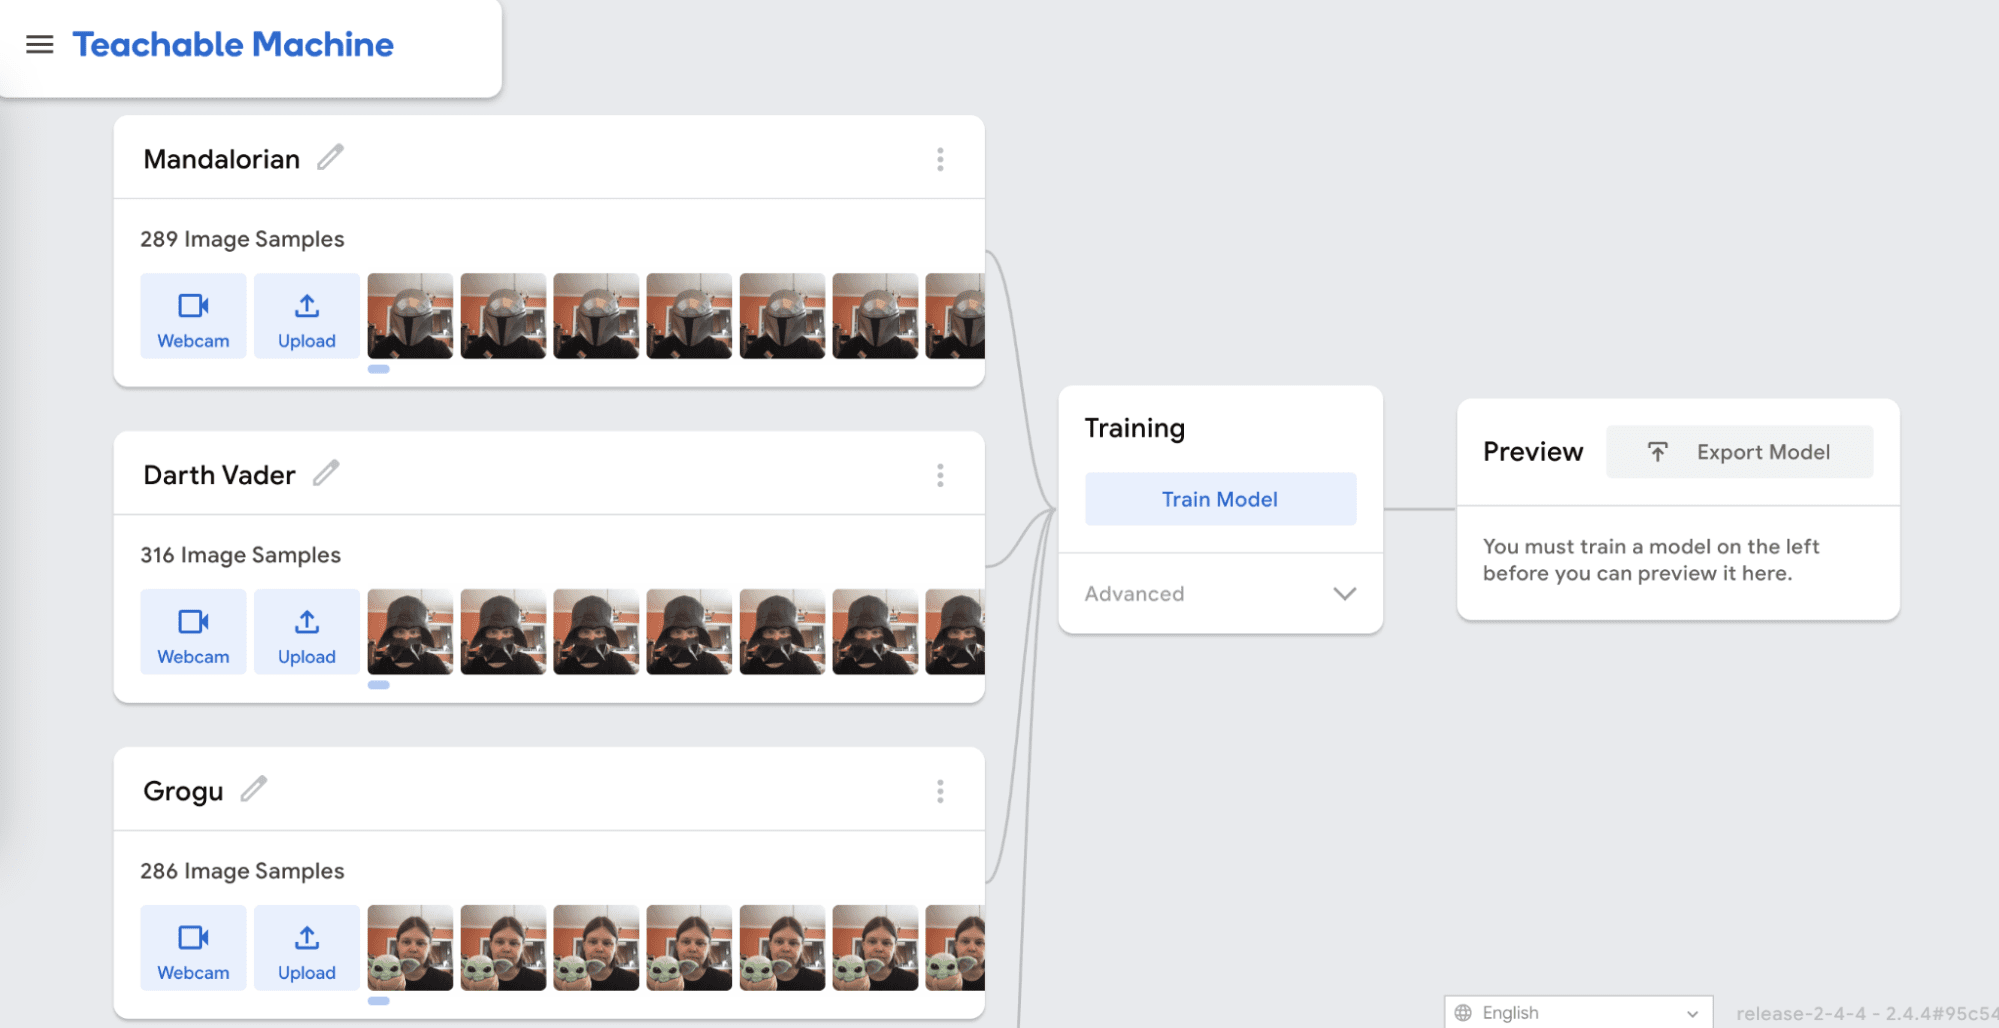
Once you have collected data for each of your classes, click Train Model.
The training will take about a minute. Make sure to leave the tab open while the model is training, even if your browser pops up a warning that the window is unresponsive.
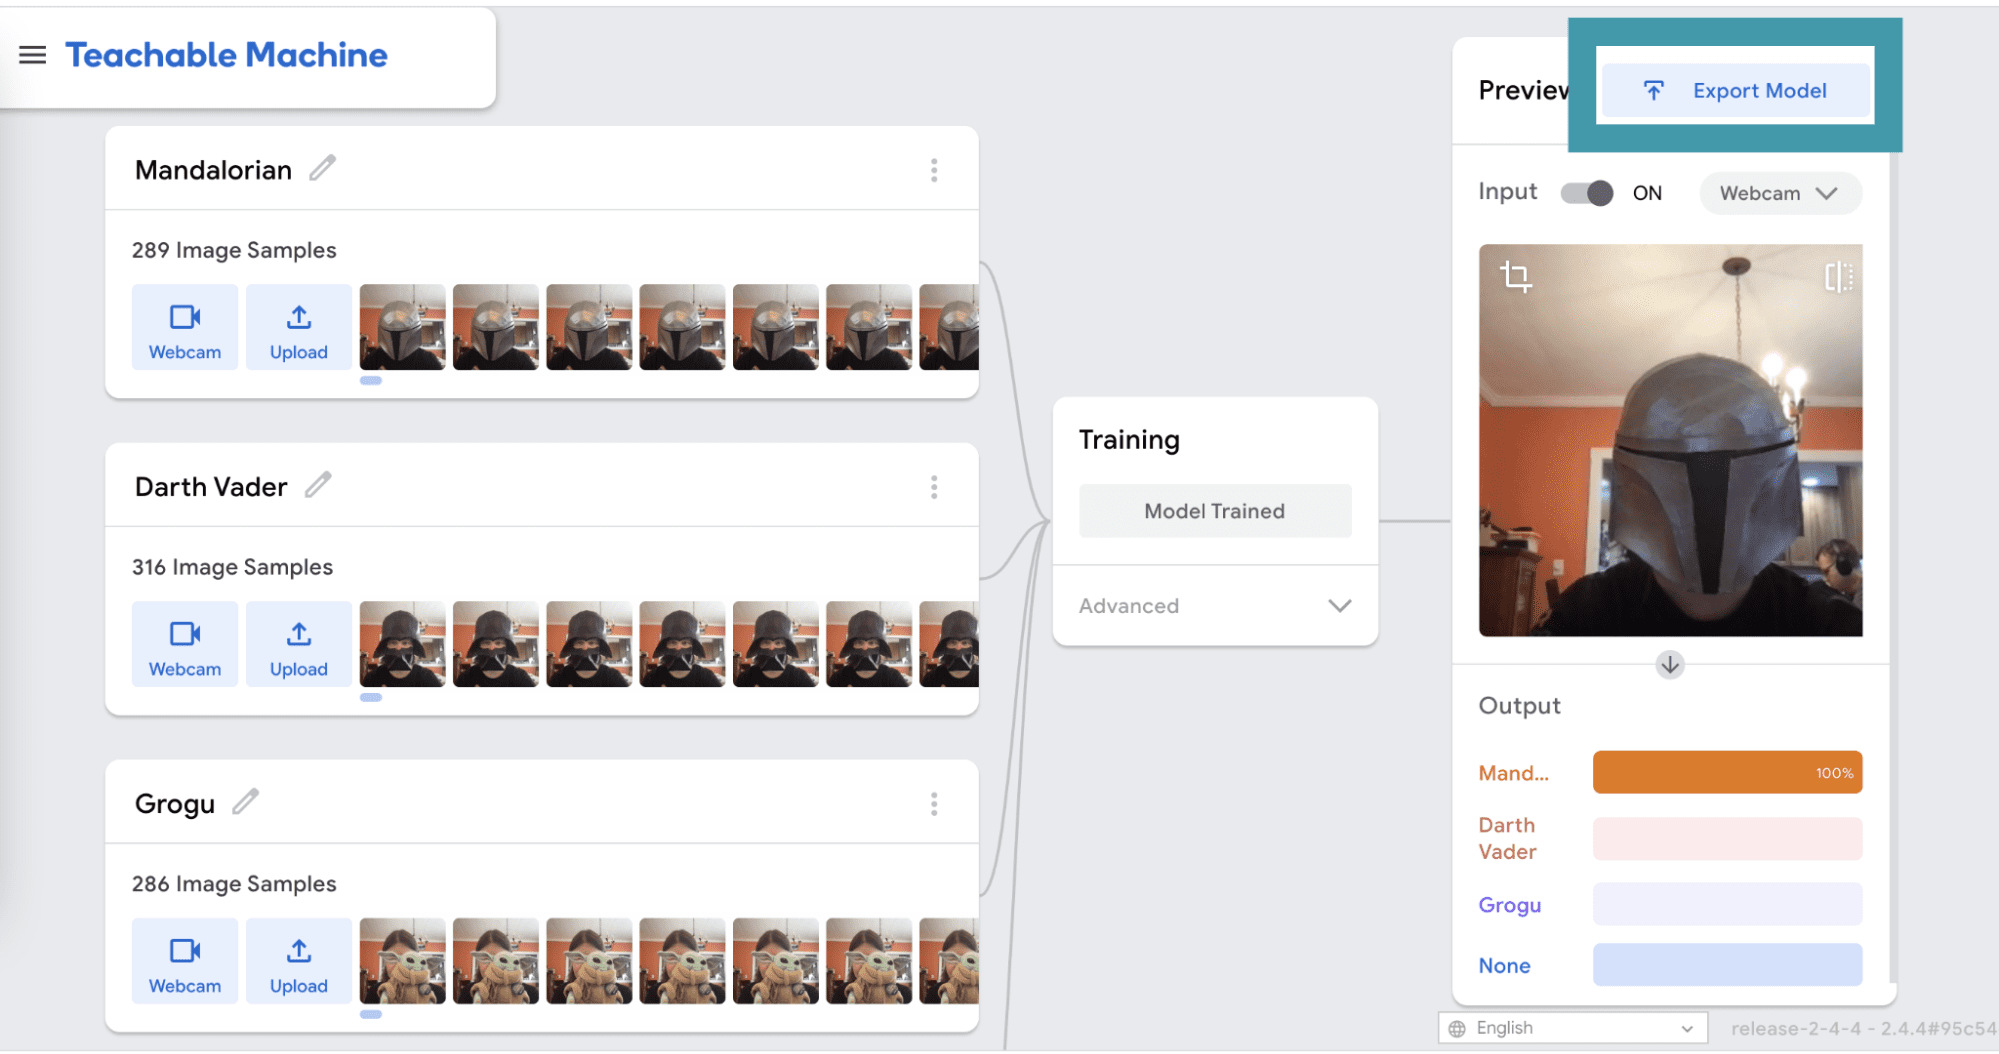
When the training is complete, you will be able to test your model in the Preview panel. Make sure that your model works the way that you want it to before moving on. If it doesn’t, you may need to add more image samples for each class and train again. When you are happy with your model, click Export Model.
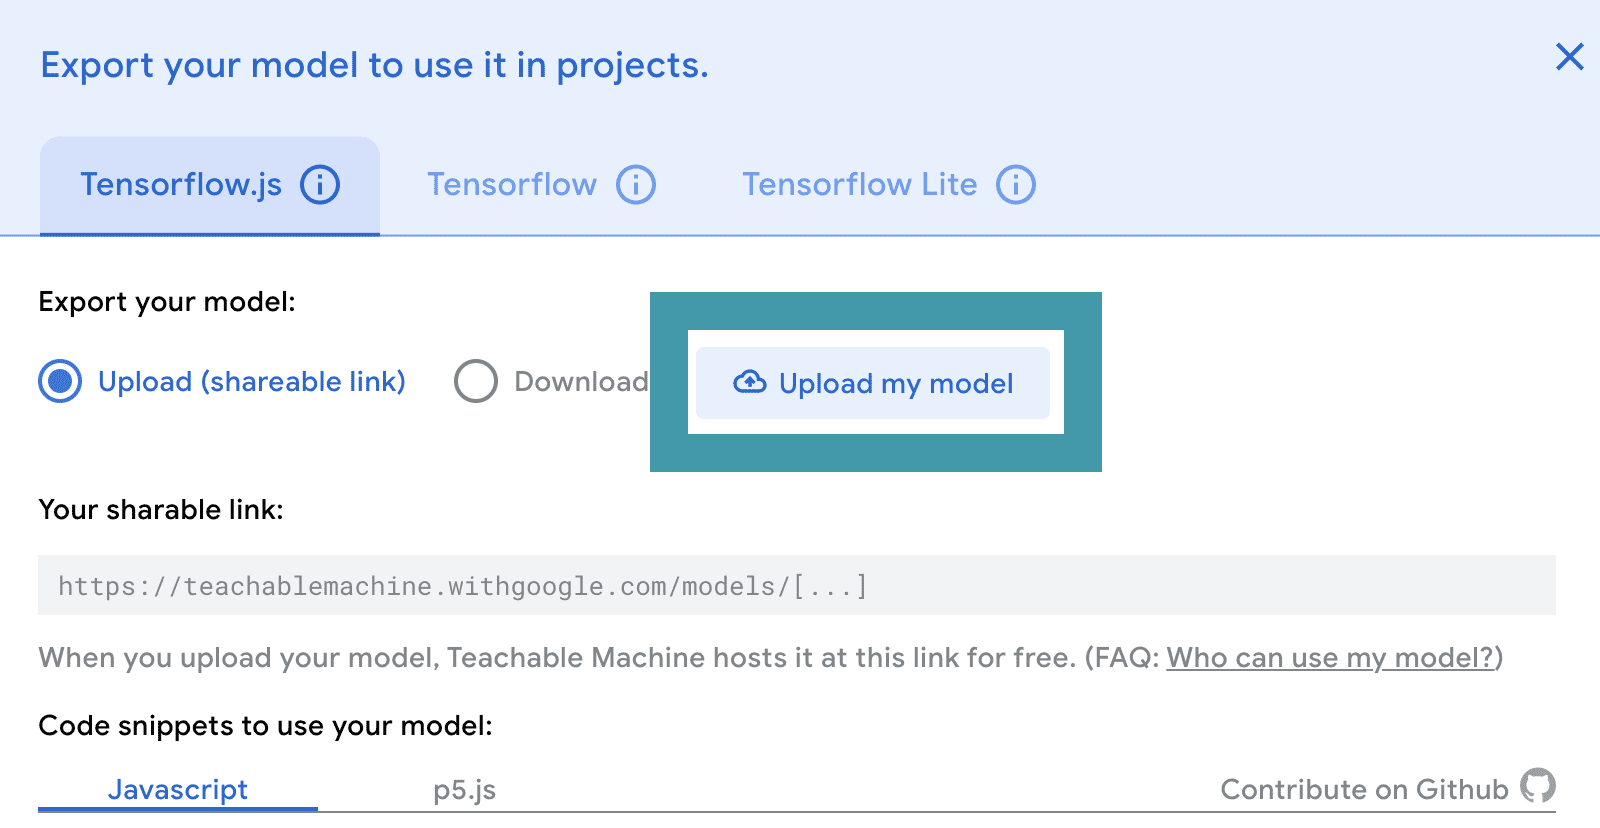
Keep all of the defaults as they are, and click Upload my model.
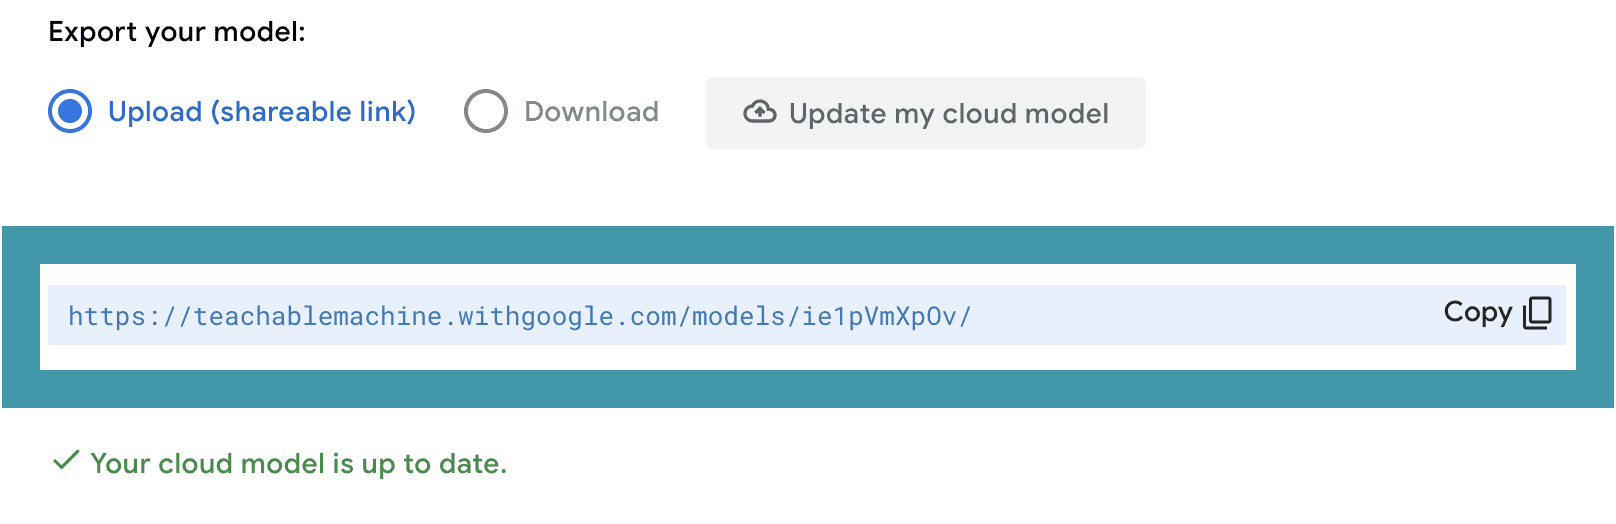
After your model has uploaded, copy your sharable link. You will need this link to create a Python program with your model. After you copy the link, you can close the export window.
It is a good idea to save your model in case you want to reference or change it later. To do this, click on the Teachable Machine menu and either download the file or save it to your Google drive.
Using the Image Classifier in Python
Open brython.birdbraintechnologies.com and connect to the Finch. You should use the browser-based version of Python for this activity because it already has all of the machine learning methods that you will need.

First, load the machine learning model into Python. In addition to Finch, you will need to import MachineLearningModel from the BirdBrain library:
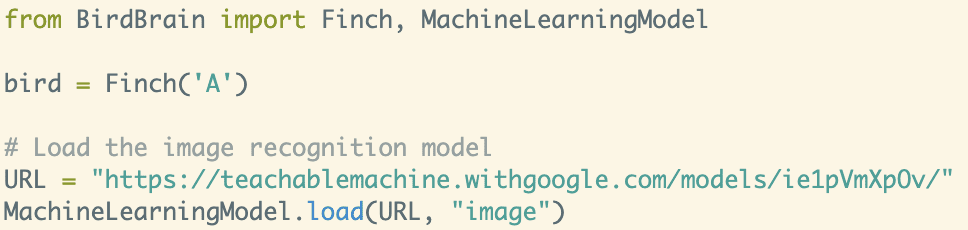
Then use MachineLearningModel.load() to import your image recognition model. This function takes two parameters. The first is a string that is the http address for your model. The second parameter is a string that denotes the type of Google Teachable Machine you are using, which should be “image” here.

Once you have loaded the model, you can use MachineLearningModel.getPrediction() to get the results of your machine learning model for the current image on the webcam. Print these results to the screen. Before the program ends, call MachineLearningModel.unload() to stop the model. Run your program to try it out!
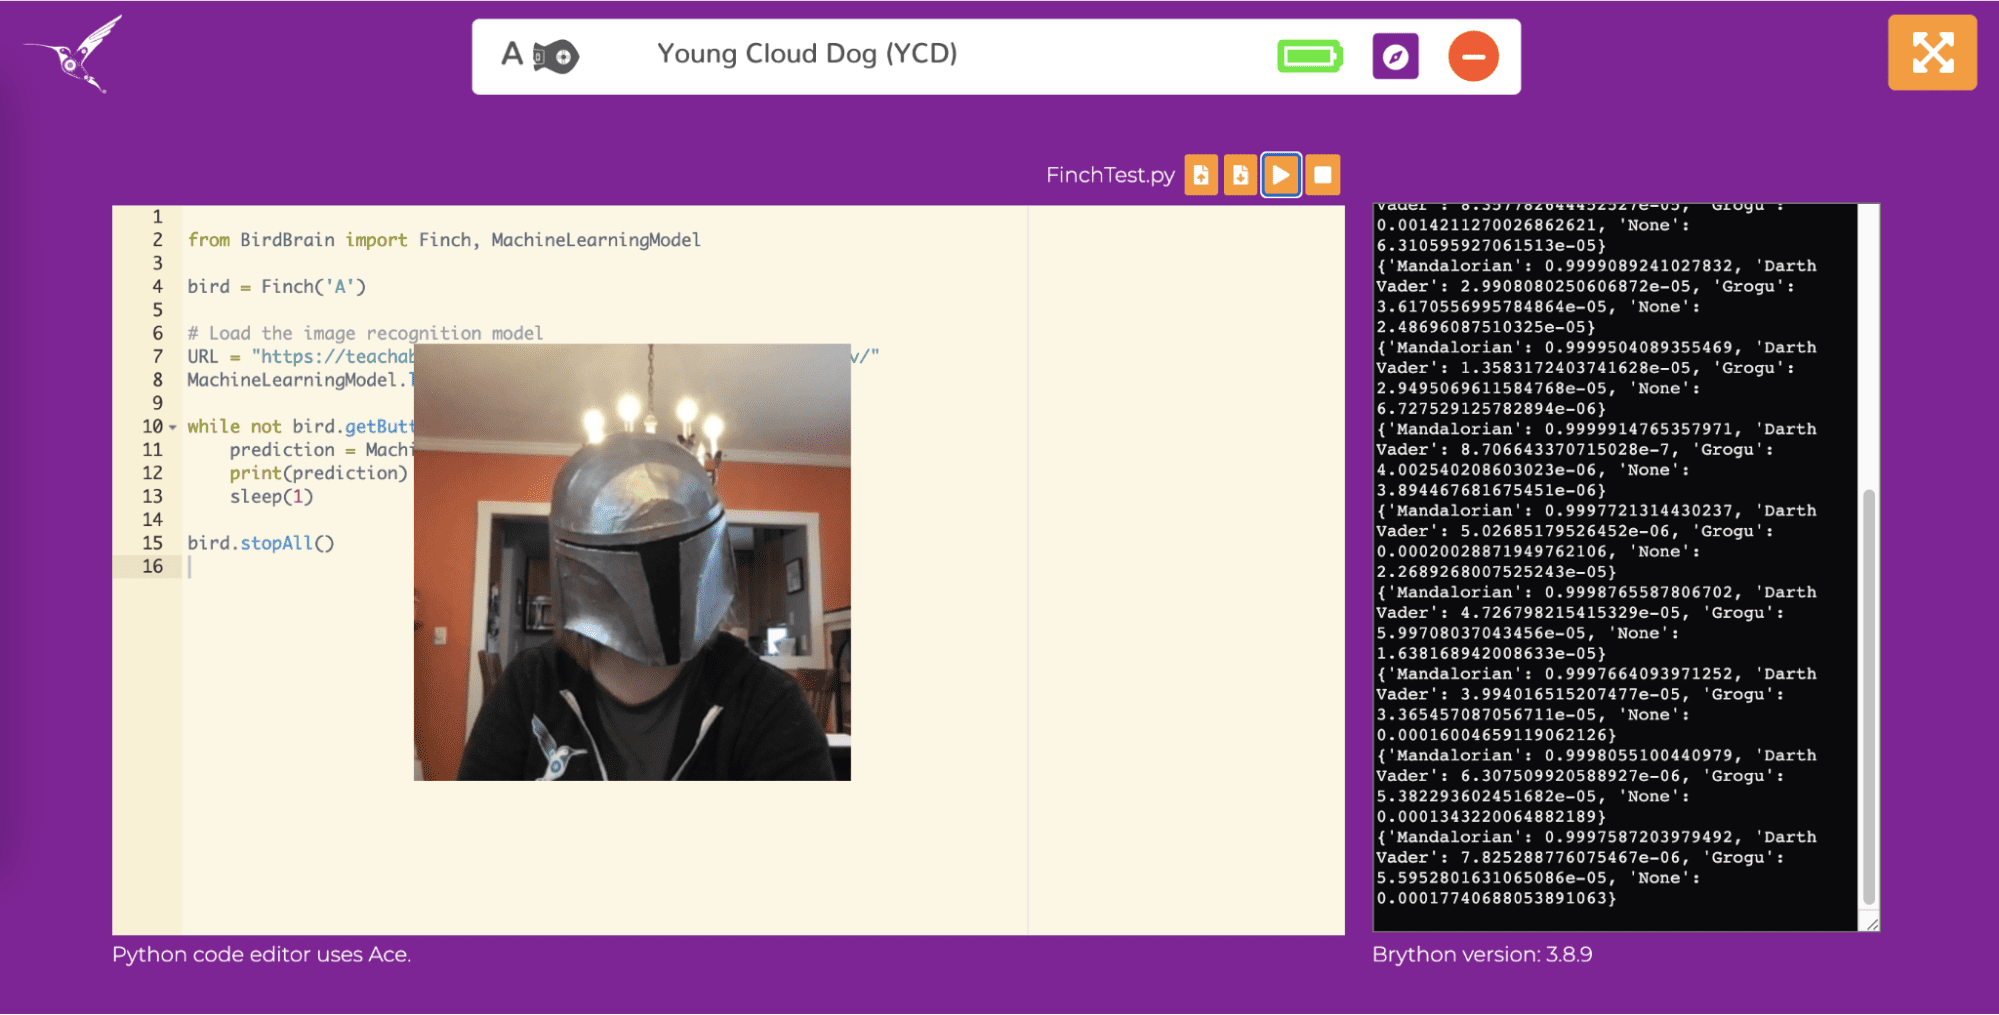
You will notice that it takes up to a minute for the classification to start the first time you run the script. When it starts, an image of what the webcam sees will appear so that you can see the image that the program is classifying.

MachineLearningModel.getPrediction() returns a dictionary. Each class label is a key for the dictionary, and the value that corresponds to that key is the probability that the current image on the webcam belongs to that class. A probability close to 1 tells you that the image probably belongs to that class, while a probability close to 0 tells you that the image probably doesn’t belong to that class. For example, here the probability of “Mandalorian” is greater than 0.99, while the probabilities of all other classes are very small. Note that extremely small values are shown in scientific notation.

You can use the values returned by MachineLearningModel.getPrediction() to make the Finch perform certain actions when each class is detected. For example, this code moves the Finch forward when there is a high probability that the webcam image is in class “Mandalorian.”
Challenge: Write a program to make the Finch respond to each of your images. For example, this video shows the Finch responding to three Star Wars characters (turn your sound on). As you test your program, notice what happens if the webcam sees an image that is not similar to something in your training data.