MicroBlocks is a free, Scratch-like programming language specifically designed for microcontrollers. With MicroBlocks, scripts run immediately right on the micro:bit without downloading, which means you can explore blocks and easily test your code. The code continues to run when the micro:bit is disconnected from the computer, making MicroBlocks perfect for programming the Finch Robot!

Setup
To use MicroBlocks with the Finch, you will need a computer – Windows, Mac, Chromebooks, and Linux are all supported. Start by downloading and installing MicroBlocks from this page.
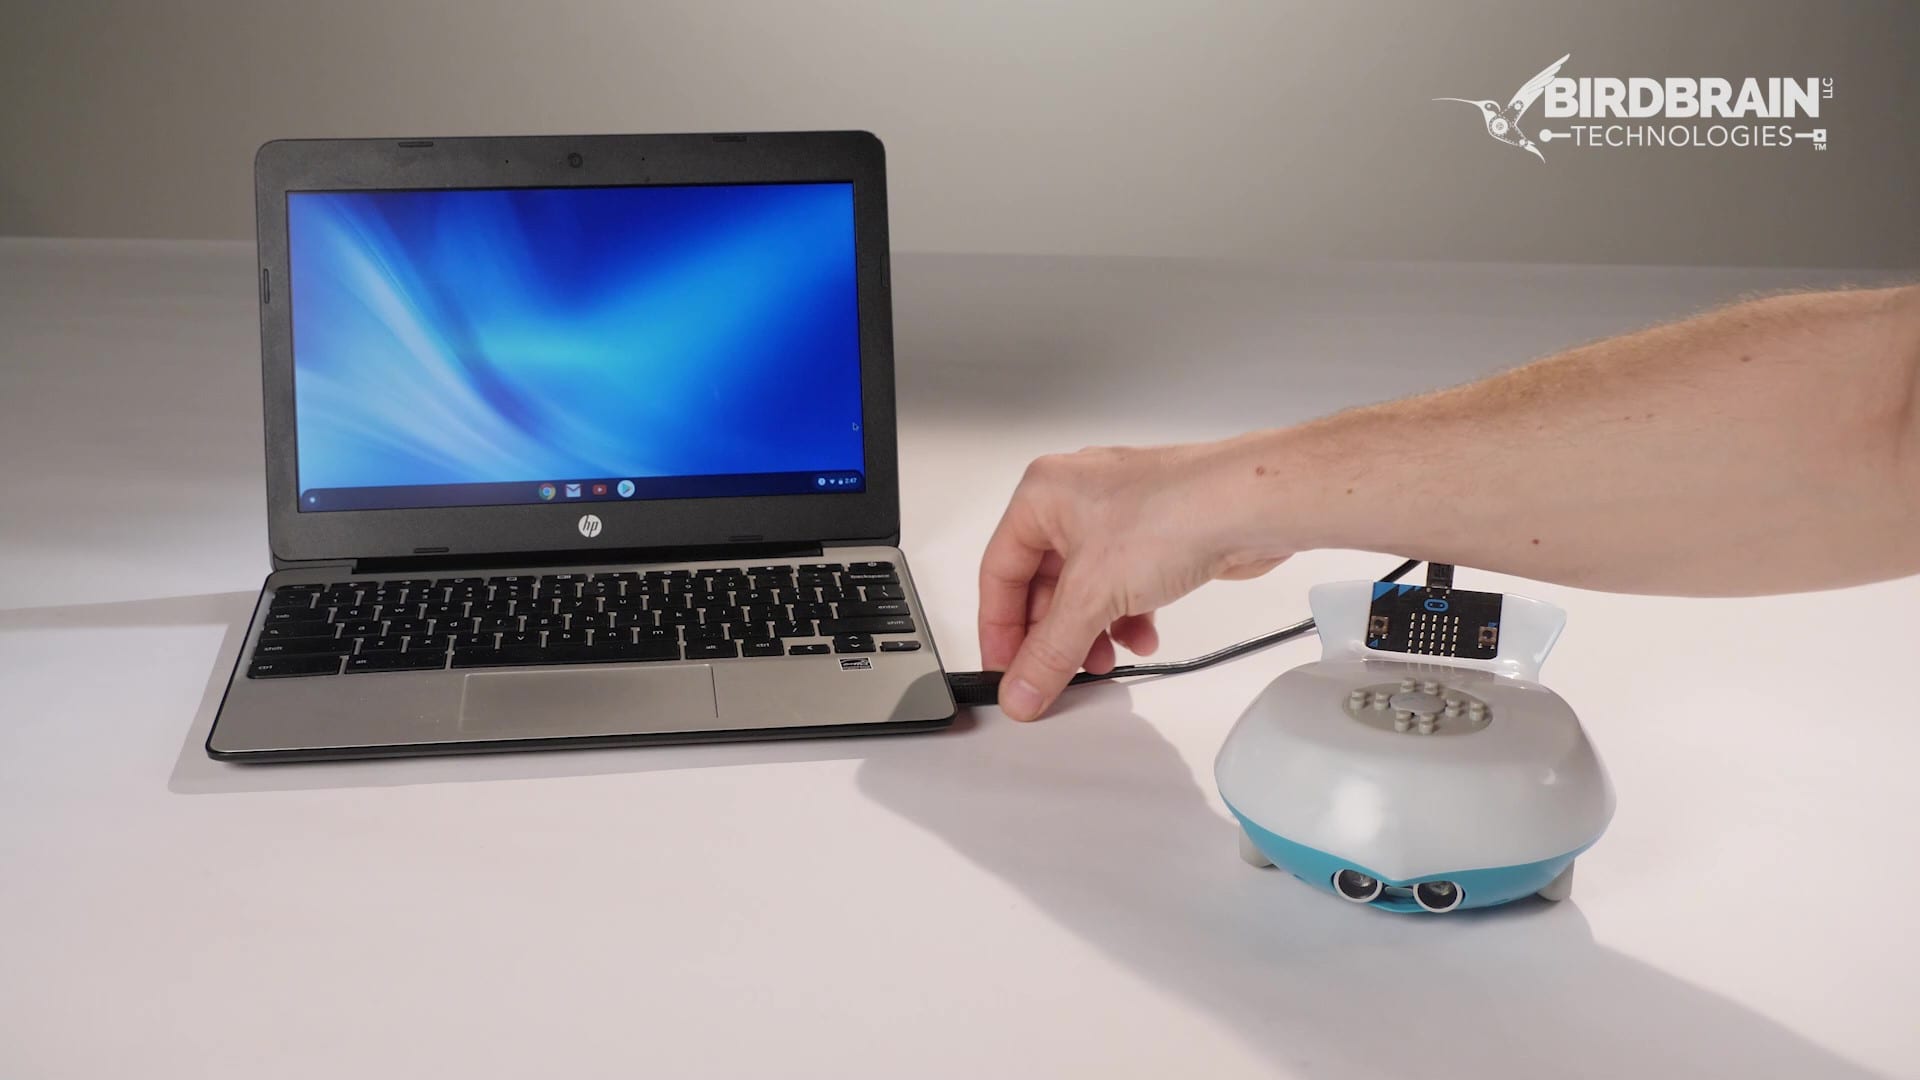
Insert a micro:bit into the Finch and connect the micro:bit to the computer with the USB cable.
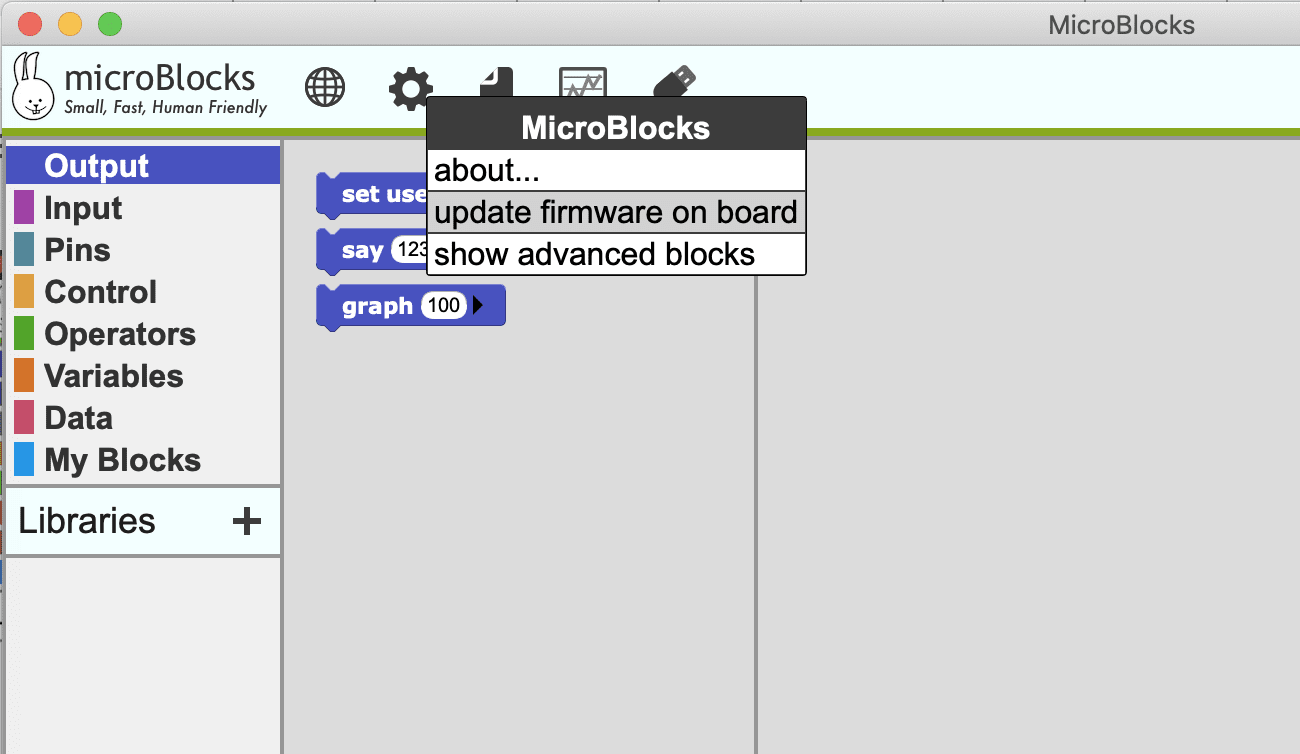
Next, open MicroBlocks. Click the Settings icon and choose update firmware on board. Choose OK when MicroBlocks asks you for permission. Your computer may pop up a window that says the micro:bit has been disconnected. Don’t worry, this is normal.
If you are on a Chromebook, the app cannot install the file automatically. Follow the instructions in the app to download the file onto your micro:bit and connect.

Once MicroBlocks has been installed on the micro:bit and your Finch is connected, you will see a green circle by the Connect button.

Next, click the + sign by Libraries and choose [] Other. Select Finch.ulib and then click Open.
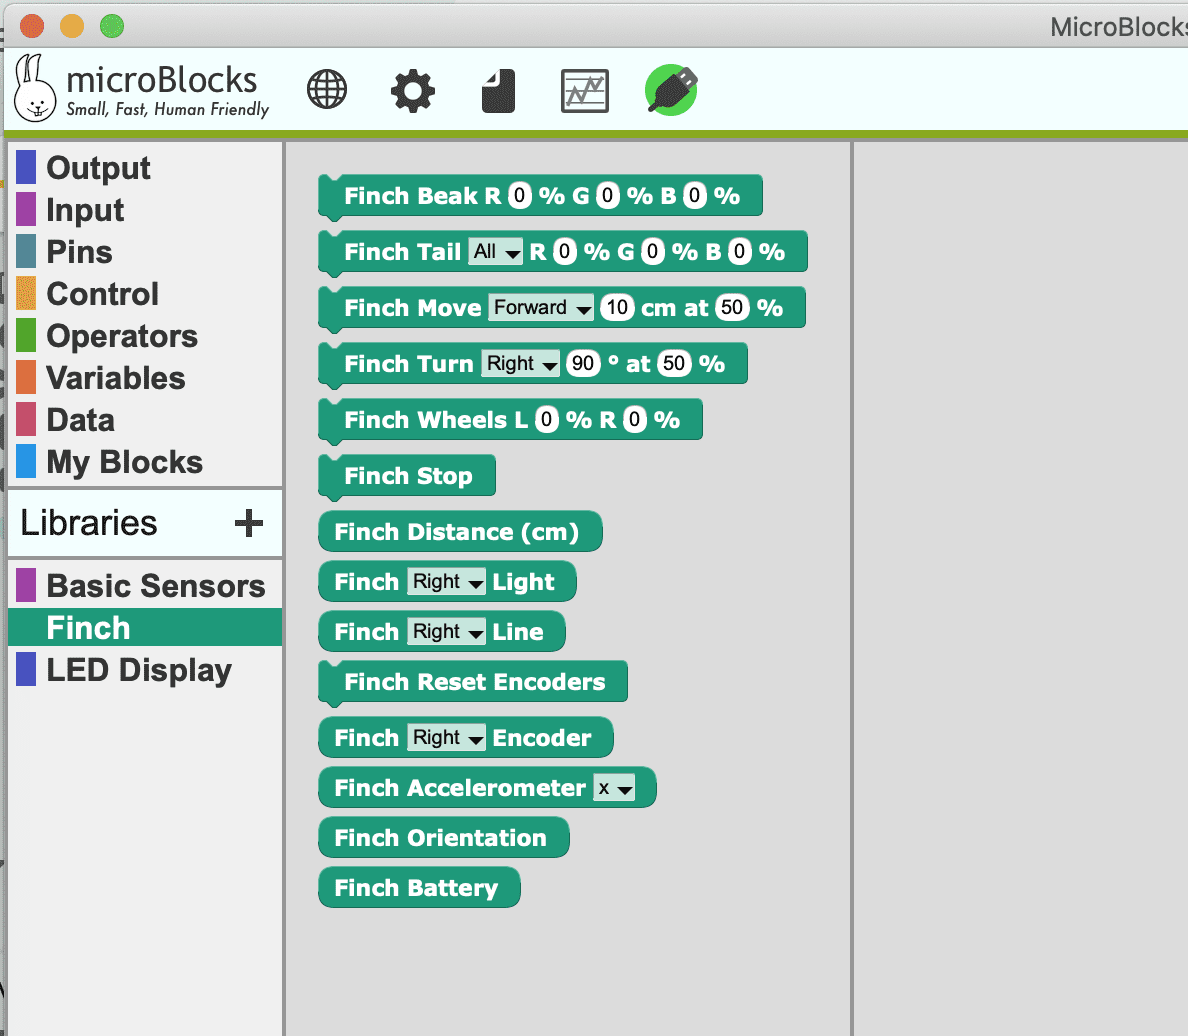
Now you will see a Finch menu in MicroBlocks that contains the blocks you will use to control the Finch.
Using MicroBlocks

Before you start programming, make sure that the Finch is turned on!
In MicroBlocks, you can click on blocks to run them, just like you can in Scratch. For example, drag a Finch Beak block into the work area and set the R parameter to 100%. if you tap on this block, the Finch’s beak will turn red.
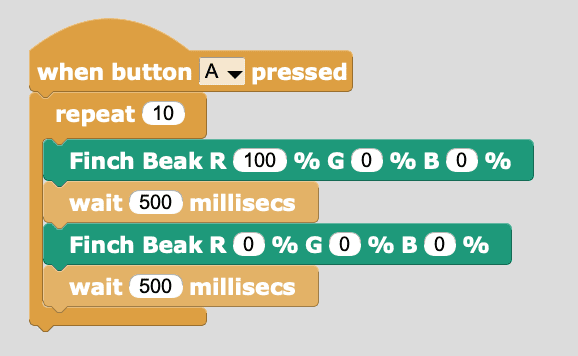
As you write programs, they are automatically downloaded to the micro:bit. As an example, this program makes the beak blink 10 times when button A on the micro:bit is pressed. All the yellow blocks can be found on the Control menu. Run this program once, and then disconnect the USB cord from the micro:bit. You can still press button A to run the program!

To change your program, reconnect the USB cord. Make sure that the Connect icon turns green in MicroBlocks to indicate that the robot is connected.
Finch Blocks
The table below contains brief descriptions of all the Finch blocks in MicroBlocks. You can also use the blocks on the Output and Input menus to write programs that use the LEDs and sensors of the micro:bit in the Finch. Don’t use the blocks on the Pins menu when writing programs for the Finch. The pins are used by the Finch, so these blocks may cause unexpected behavior.
| Finch Block | Description | |
|---|---|---|
| Sets the tri-color LED in the Finch beak to the color specified by red, green, and blue brightness values. The values range from 0% to 100%. | ||
| Sets one or all of the tri-color LEDs in the Finch tail to the color specified by red, green, and blue brightness values. The values range from 0% to 100%. | ||
| Moves the Finch forward or back for a given distance at a given speed (0-100%). | ||
| Turns the Finch right or left a given angle at a given speed (0-100%). | ||
| Sets the rotation speeds of the left and right Finch wheels to values from -100 to 100%. | ||
| Stops the Finch wheels. | ||
| Returns the value of the Finch distance sensor in cm. | ||
| Returns the value of the right or left Finch light sensor from 0 to 100. | ||
| Returns the value of the right or left Finch line tracking sensor from 0 to 100. | ||
| Sets the value of the left and right encoders to zero. | ||
| Returns the number of rotations that the right or left wheel has turned. Each rotation is divided into 100 units, so this function will return 100 for one full wheel rotation. | ||
| Returns the value of the Finch accelerometer in the x, y, or z direction. | ||
| Returns the orientation of the Finch as a string. The options are “Level”, “Beak up”, “Beak down”, “Tilt left,” “Tilt right”, “Upside down”, and “In between”. | ||
| Reads the value of the battery in milliVolts. You may start to see strange behavior when the value is below 3276 mV. |
Example Program
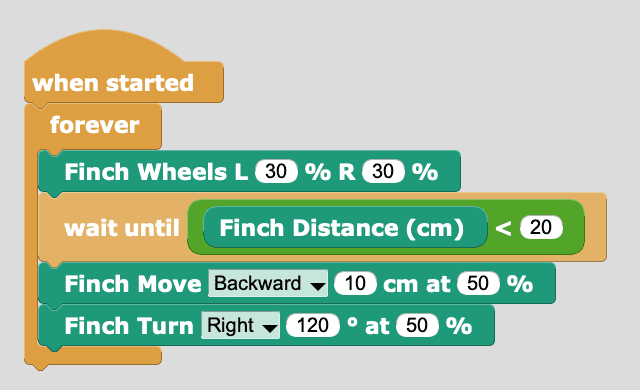
Since programs written in MicroBlocks are automatically downloaded to the micro:bit, it is an excellent choice for writing programs for the Finch. The robot can then be disconnected from the computer to roam its environment.
To create a basic program to move and avoid obstacles, use the distance sensor to detect when the Finch is near a wall or another obstacle. If the Finch detects an obstacle, it should back up and turn. Otherwise, it should drive forward. Basic code for this is shown here. After you have a basic program working, modify it to try something new!