Lesson 8 – Obstacle Sensors

Required Python Concepts

None

Teaching Materials

Get Access

The last Finch sensors are the obstacle sensors. In the center of the Finch’s beak, below the temperature sensor, there is a small device that emits infrared radiation. If there is an obstacle near the Finch, this radiation will bounce off the obstacle and be detected by one of the two infrared sensors that are the Finch’s “eyes.”

The Finch can only detect obstacles that are within 2”-4” of one of the sensors. Large, light-colored objects (like cardboard boxes) make the best obstacles. Very narrow objects or objects made of certain black plastics may not register as obstacles.

The obstacle() method returns a tuple with two Boolean values, one for the left obstacle sensor and one for the right. Each variable is True if an obstacle is detected and False otherwise.

Exercise 1:

Write a program that makes the Finch drive forward until it detects a wall or other obstacle.

Exercise 2:

Use the Finch as a security system! Place the Finch in front of a door. As long as the door is closed, the beak should blink red. When the door opens (obstacle gone), the Finch should go crazy with light, sounds, and movements.

Exercise 3:

Program your Finch to wander around a room. When it encounters an obstacle, it should back up and turn away from it randomly for two seconds – you can do this by generating two negative random values for the left and right wheel velocities. The Finch’s beak should glow green when it is moving forward. The beak should change to red when the Finch sees an obstacle and is moving away from it. Since Finches are diminutive and polite creatures, it should also apologize (or beep apologetically) when it sees an obstacle. The Finch should continue running this program until it is picked up and placed on its tail.

Exercise 4:

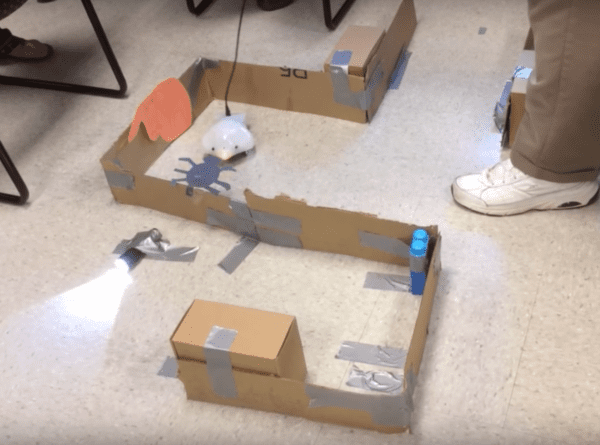
Start by setting up a simple maze (unless your teacher has already set up a maze). The picture below shows a sample cardboard maze created by teachers at Longwood University’s Institute for Teaching through Technology and Innovative Practices (ITTIP) program.

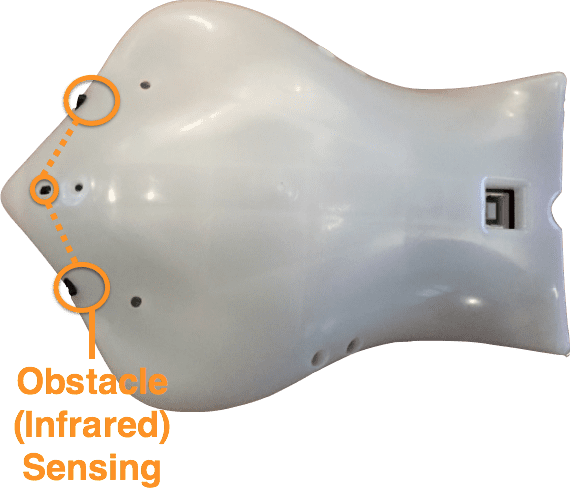
To complete the maze, you will create a “wall following” robot. To follow a wall, your robot should repeat these three steps:

  • Move forward in a curved path (curving to the left or right) until an obstacle is detected.
  • Move straight back a short distance.
  • Rotate in the opposite direction (45° to 90°).
  •  

    This is a basic algorithm for following a wall, but you have some work to do to turn this algorithm into a program that works well for your robot. You will need to adjust your motor power and movement times until your program works correctly. Try to make your robot complete the maze as quickly as possible!

    Another way to solve a maze would be to write a program with a specific sequence of moves and turns. What are the advantages of the wall-following algorithm?

    Extension 1: Can your robot start at the end of the maze and move through the maze to the start? Do you need to modify your program?

    Extension 2: Could your program solve a new maze? How much could the current maze change before your program would no longer work? What changes can you make to your program to enable it to solve different mazes?