Register to receive free access to all teacher materials.

l Projects
Print
Get a Grip!
In this activity, you will measure your gripping power. You will build a robot that uses lights and motors to tell you how hard you are gripping.
Created By
Adapted from Experiment 18, Middle School Science with Vernier, © Vernier Software & Technology
Programming Language
Snap!
Subjects
Science
Grades
6-8, 9-12
Objective & Learning Goals
In this experiment, you will
- Use a computer and a Gas Pressure Sensor to measure your gripping power.
- Write a computer program to measure gripping power.
- Use lights and motors to indicate the magnitude of gripping power.
- See which of your hands has the greater gripping power.
- Compare your gripping power with your classmates.
Materials
- computer
- plastic bottle
- Hummingbird kit
- Vernier BTA Sensor Adapter for Hummingbird
- 1-hole stopper with tapered valve
- Vernier Gas Pressure Sensor
- heavy-wall plastic tubing
Procedure
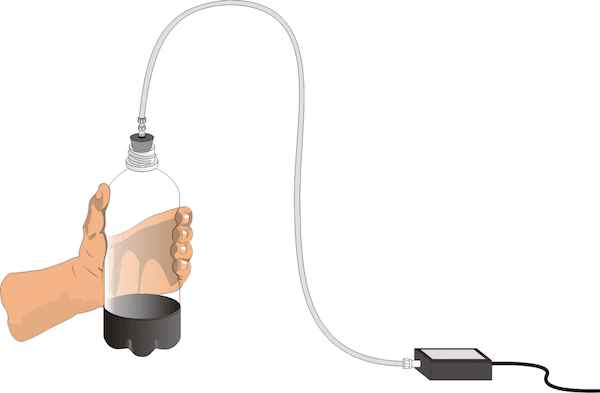
- Connect the plastic bottle to the pressure sensor as shown below.
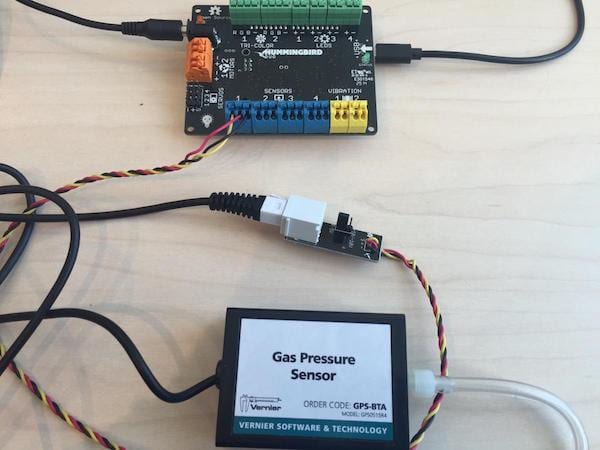
- Connect the Vernier BTA sensor adapter to the Hummingbird. Then connect the pressure sensor to the adapter. The jumper on the adapter should be set to 0-5 V.
- To read a measurement from the pressure sensor, you will use the Hummingbird Raw Sensor block in Snap!. This block will read a number between 0 and 100.

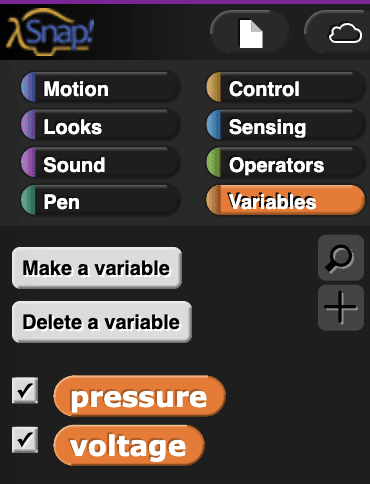
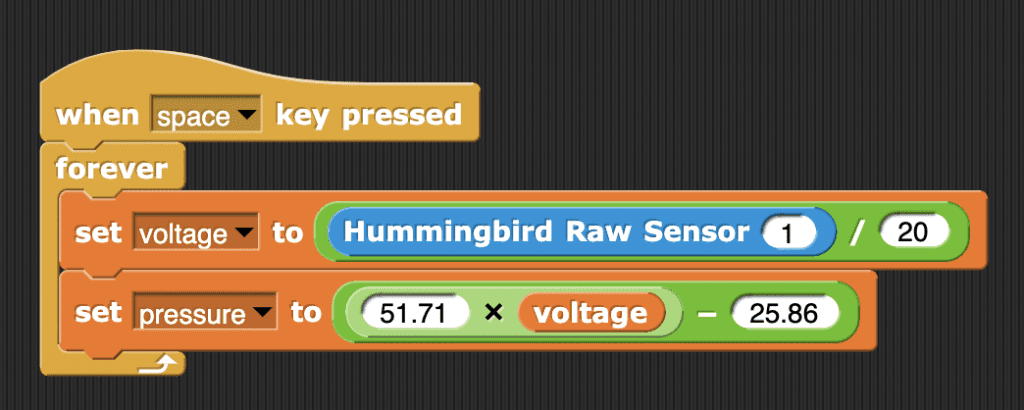
- To convert the Hummingbird sensor value to voltage, start by declaring two variables in Snap! from the Variables menu. Name them voltage and pressure.
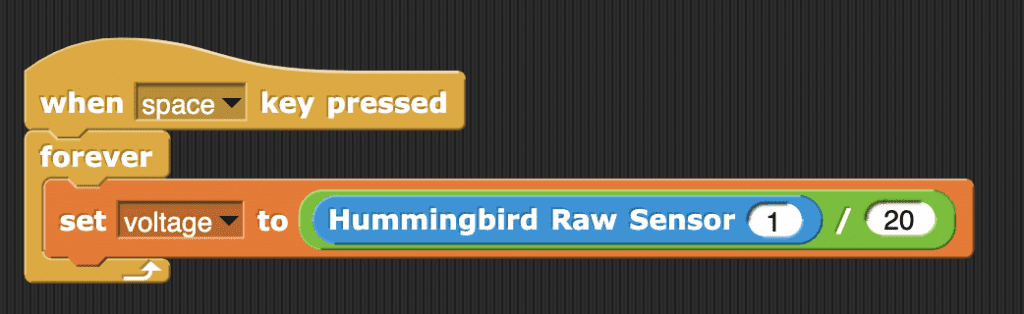
- To convert the sensor value to voltage, divide it by 20. Do this within a forever loop so that the value will be continually updated.
- The Vernier manual for the pressure sensor provides a linear equation that you can use to convert voltage to pressure in kPa: pressure = 51.71*voltage – 25.86
- Grip the bottle as hard as you can as you watch the variables change. What is the highest pressure that you see? What is the pressure of a light grip?
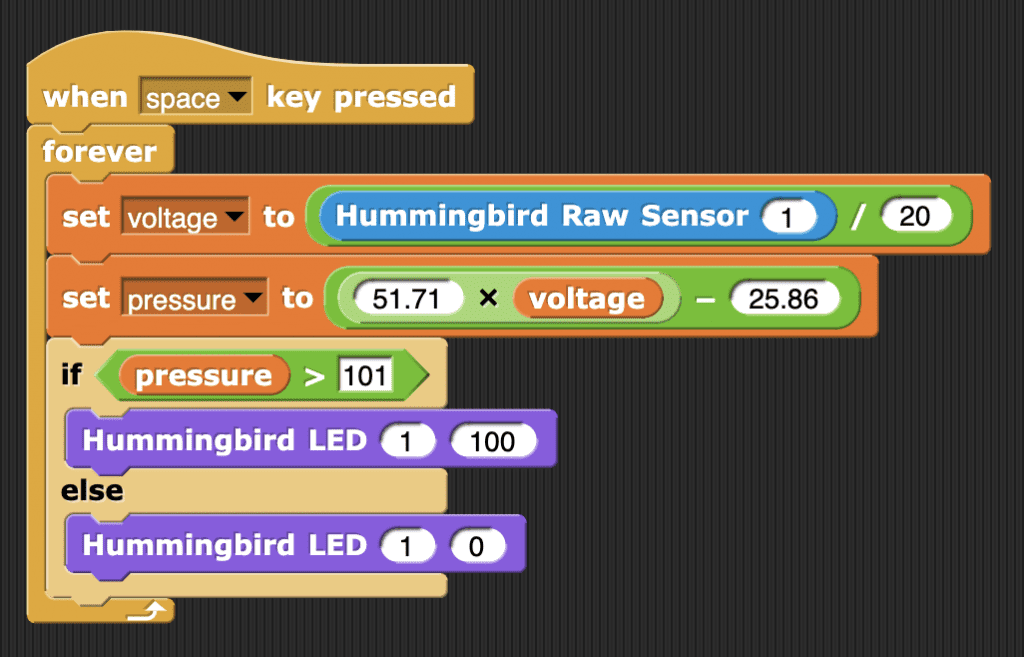
- Next, use the pressure variable to control a Hummingbird light. For example, atmospheric pressure at sea level is about 101 kPa. This program turns on LED 1 if the user’s grip pressure is above this threshold.
- Use other thresholds to make additional LEDs light up as the grip pressure increases. Be sure to label each light with its threshold so that you know how hard you are gripping.
- You can incorporate position and rotation servos into your robot. For example, a position servo could point to the words “Way to go!” when the grip pressure is above a certain threshold. Again, remember to label each component with its threshold.
Making Comparisons
- Can you use your robot to determine which of your hands is stronger? Explain your answer.
- Grip the bottle as hard as you can for 60 s. How does your grip pressure change over time?
- At the surface of the ocean, the air pressure around you is 101 kPa. As you go under the water, the pressure increases. For each meter that you go down, the pressure increases by 10 kPa. How does your maximum grip strength compare to the pressure three meters under the water?