Register to receive free access to all teacher materials.

l Projects
Programming Language
BirdBlox
Subjects
Programming Tutorials
Grades
6-8, 9-12
Objective & Learning Goals
- Use systems of loops to control a program’s flow
- Read tablet and Hummingbird sensors
- Control servos and LEDs
Standards
COMPUTER SCIENCE TEACHERS’ ASSOCIATION (CSTA)
CSTA Standards are split into different grade levels: 3-5, 6-8, and 9-10. Working with the Hummingbird Robotics Kit meets multiple standards across these grade-level delegations.
Visit this page for a more detailed explanation of how working with the Hummingbird Robotics Kit applies to meeting CSTA Standards.
Photo Gallery
Hummingbird Setup
- Remove the circular plastic horns from each servo. Replace one with the large red flower-shaped horn and the other with the white “+” shaped horn. Do not replace the screws, as we may need to readjust the horns, and the friction between the horn and the servo should be enough for our purposes.
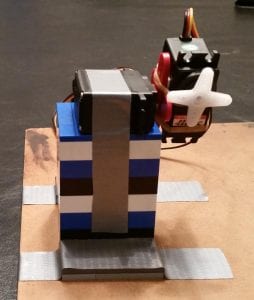
- Create a base for your robot by attaching a block to a flat surface or board. The block will hold up the servos, which will tilt the maze.
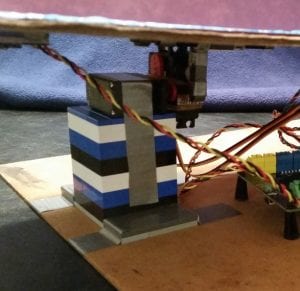
- Attach the two servos together at a right angle as shown above using rubber bands, tape, or hot glue.
- Mount the servos on the block so that both servos can turn freely.
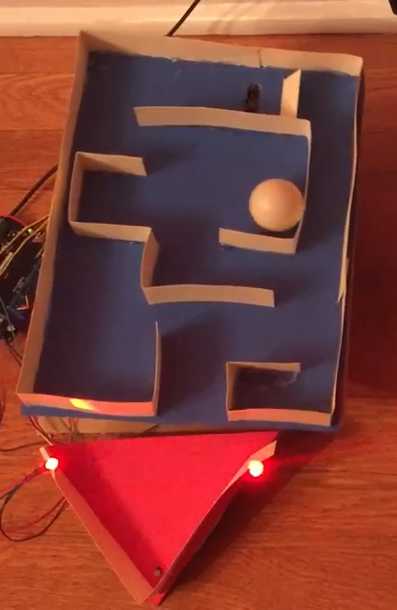
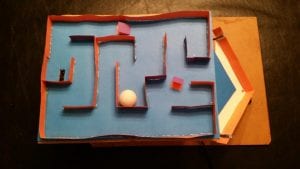
- Construct a simple maze out of paper and cardboard for the ball to move through. There will be some lag when controlling the robot, so don’t make the maze too difficult.
- Place an upward-facing distance sensor at the start of the maze to detect the ball.
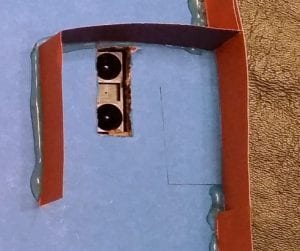
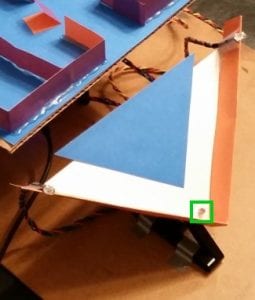
- Likewise, add a light sensor to the end of your maze. You could instead make a receiving container with the light sensor inside it as shown below:
- Attach the maze to the second servo. You will need a right-angled piece of cardboard/plastic to do this. You may find it easier to remove the horn from the servo and attach that to the maze.
- Connect the servo with the “+” shaped horn to servo port 1 and the servo with the flower-shaped horn to servo port 2.
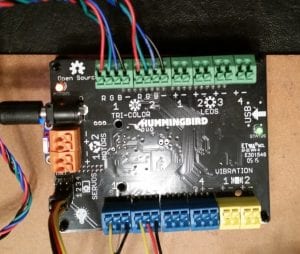
- Attach the distance sensor to sensor port 1.
- Attach the light sensor to sensor port 2.
- Decorate the maze with 2 tri-color LEDs, which should be attached to tri-color ports 1 and 2.Now you are ready to begin programming!
Programming
NOTE: While programming, you should detach the “+” horn (and the maze attached to it) from its servo. This will prevent the maze from being damaged if the servo moves too far.
- Turn on Bluetooth if it is off.
- Open the BirdBlox app.
- Connect to the Hummingbird.
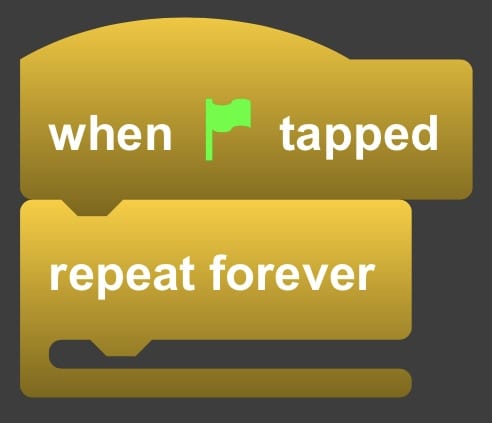
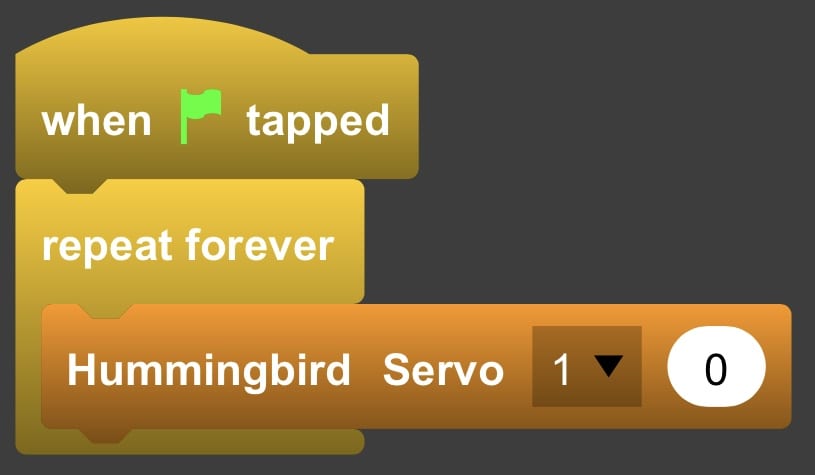
- Start your program with a when flag clicked block and a repeat forever loop, both of which are from the Control category.
- We will be using the tablet’s accelerometer to control the two servos. Start by placing a Hummingbird Servo block within the forever loop.
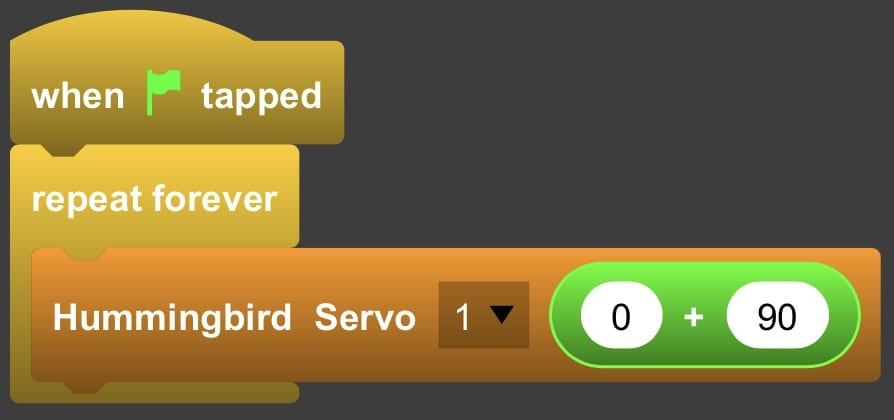
- Acceleration values can be anywhere from around -10 to 10. However, servos do not accept negative values. We can resolve this by adding 90 to the value before we send it to the servo. Head to the Operators category and place an addition operator in the second slot of the servo block. Then type 90 into the second slot of the addition block. 90 gives the servo the maximum amount of room to move in each direction.
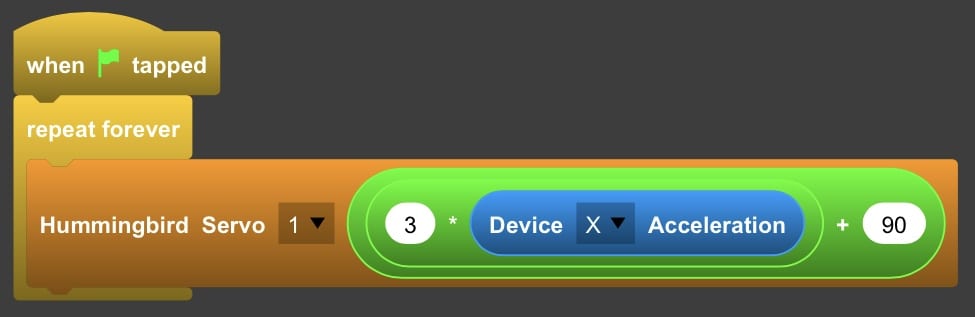
- A change from -10 to 10 (80 to 100 after adding 90) is small and will move the servo only a little. To resolve this, we will multiply the acceleration value by 3. Add a multiplication block (from Operators) to the first slot of the addition block. Then type 3 into the first slot of the multiplication block. Place a Device Acceleration block (Tablet menu) into the second slot of the multiplication block.
- If you have not already, lock your device’s orientation. The will prevent the screen from turning when you tilt the tablet.
- Run your program by tapping the green flag. When you tilt your tablet back and forth, the upper servo (the one normally attached to the maze) should move accordingly. If it moves in the opposite direction to the tablet, change the 3 in the multiplication block to -3. Stop your program when you are done testing by tapping the red stop sign.
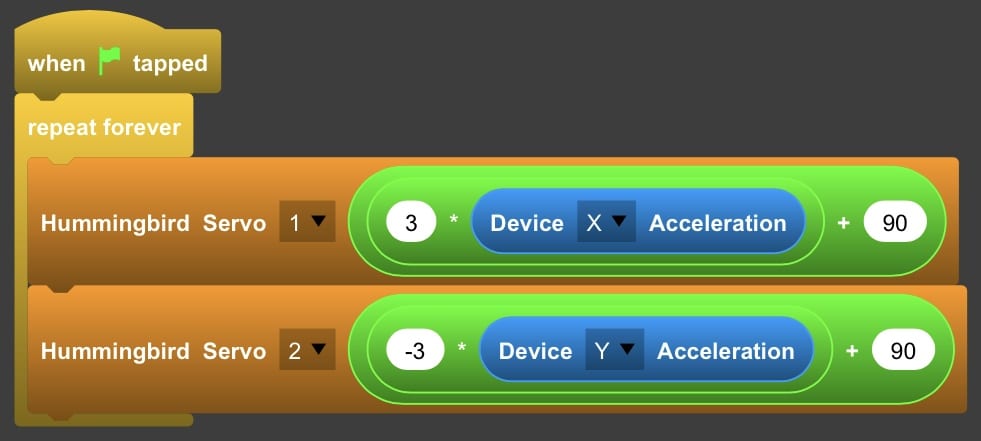
- Now we just need to link the second servo to the y acceleration. Duplicate the Hummingbird Servo block by tapping and holding. Attach the copy below the original servo block. Change the port number from 1 to 2 and use the drop-down menu to replace the “X” with a “Y.”
- Test the program again. Tilt your tablet back, forth, left, or right and the servos should move accordingly. Again, you may have to reverse one of the servos by changing the corresponding multiplication block from 3 to -3.
- You maze is now playable! However, there are still more features we could add.Let’s make the robot blink the LEDs when we successfully move the ball to the end of the maze and cover the light sensor. We will repeatedly move the servos to match the tablet’s orientation just like we did before, but only until the light sensor is covered. Then we will blink the LEDs.
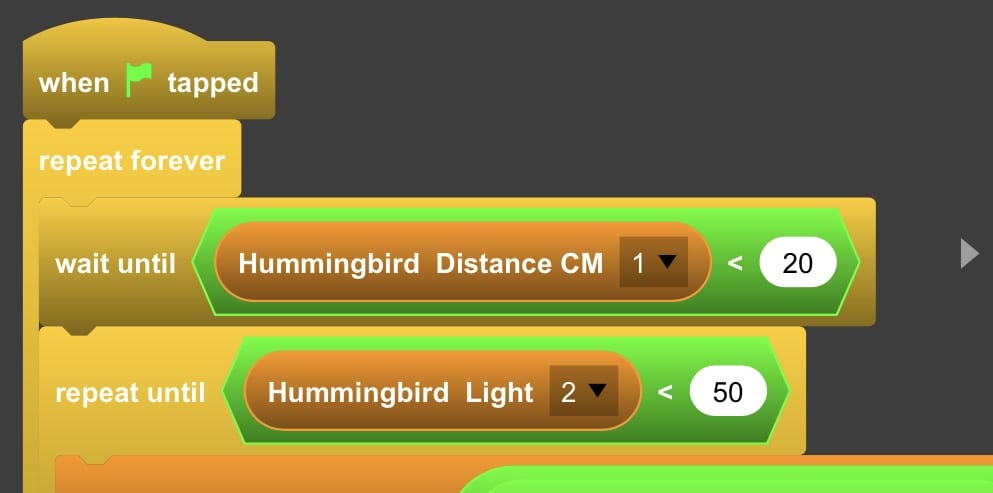
- Place a repeat until block from the Control category so that it is within the forever loop but above the first servo block. Then drag both servo blocks into the repeat until loop.
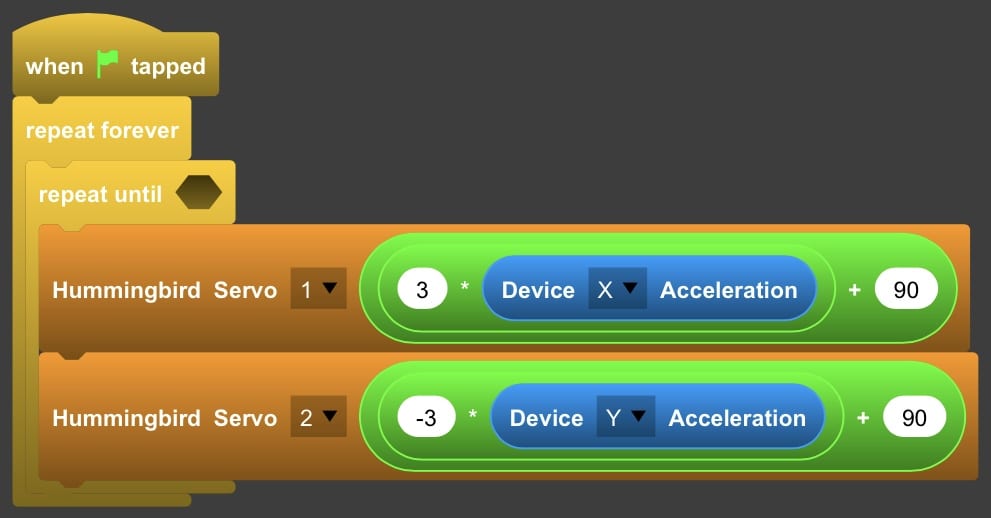
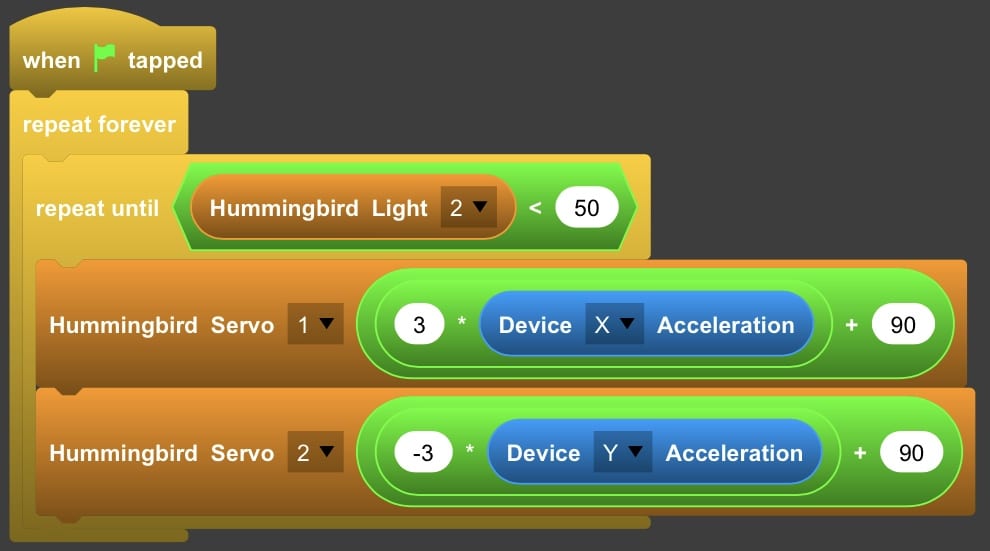
- The loop should repeat until the light sensor is covered and falls below a certain value. Drag a less than block from Operators into the slot on the repeat until block. Then place a Hummingbird Light block into the left slot of the less than block. Change the port of the light sensor block to port 2. Then type 50 into the right side of the less than block. You may have to adjust this value based on your lighting conditions.
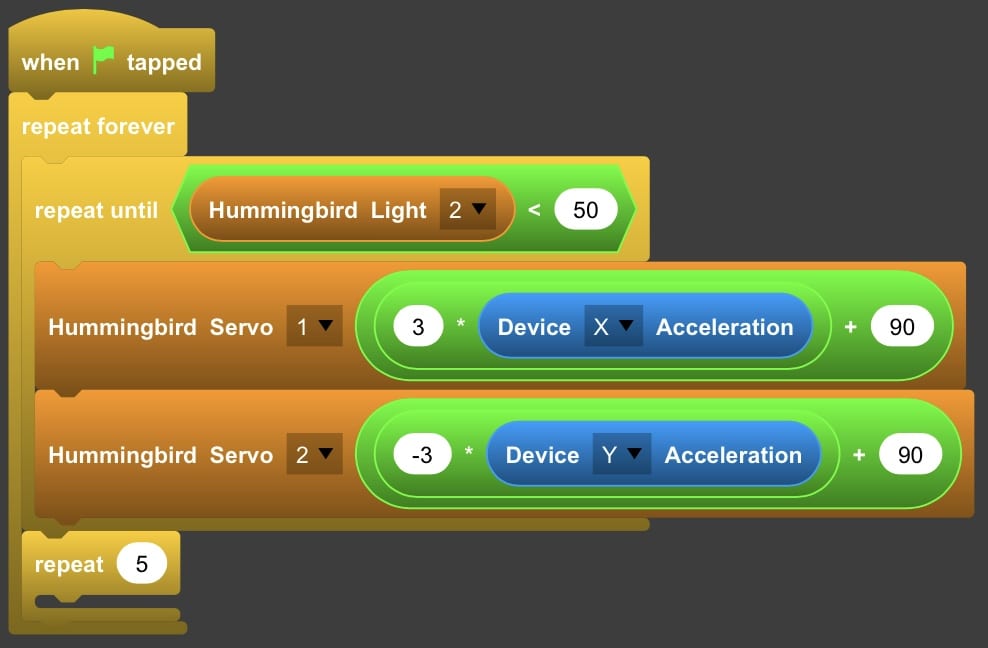
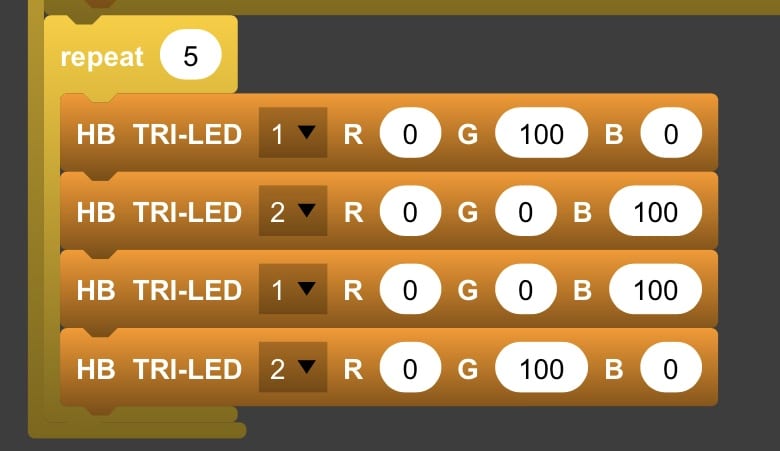
- When the sensor is covered, the robot will put on a light show! To make the lights blink many times without using too many blocks, we will use the repeat block from the Controlcategory. Place this loop directly below the repeat until block. 10 is a little much, so change the value to 5.
- Add HB TRI-LED blocks to light up your robot. Be sure to use both LEDs.Here is the pattern we used:First we made LED 1 green and LED 2 blue.
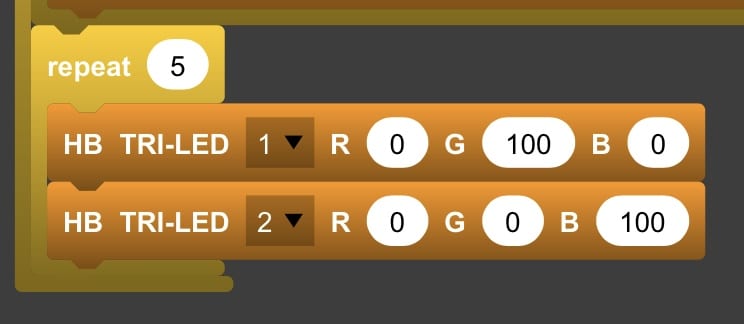 Then we reversed the colors, making LED 1 blue and LED 2 green.
 NOTE: If you are wondering why we did not add wait blocks in between the LED blocks, we made the program this way because the BirdBlox app automatically has a small amount of delay in between Hummingbird blocks. This delay is caused by the time needed to send commands via bluetooth.
 - Once the pattern is done, the program should wait for the ball to be placed at the start of the maze before activating the servos again. For this purpose, add a wait until block from the Control category above the repeat until block.
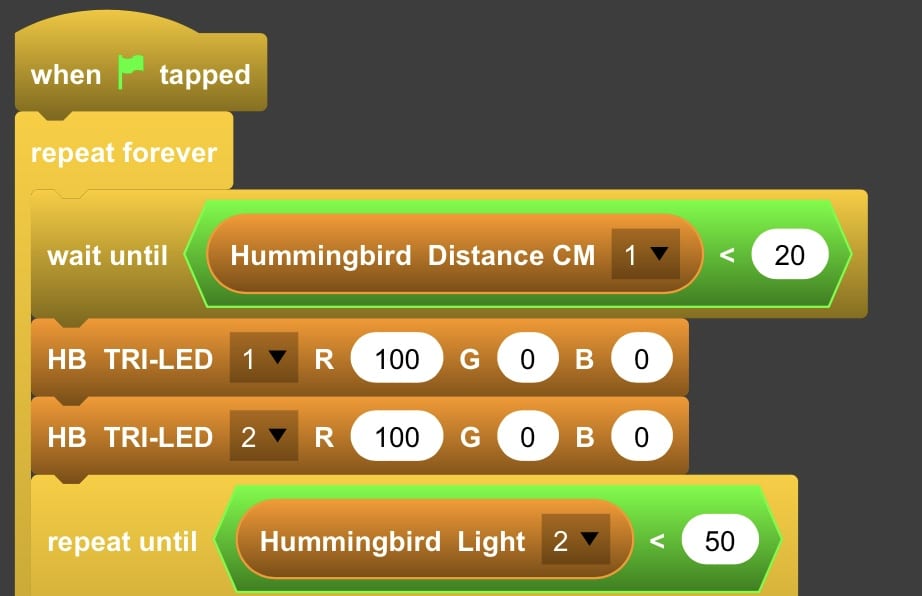
- We want the program to wait until the distance sensor sees the ball (or if the ball is too small, until it sees a hand holding the ball). Add the blocks Hummingbird Distance CM < 20to the wait until block.
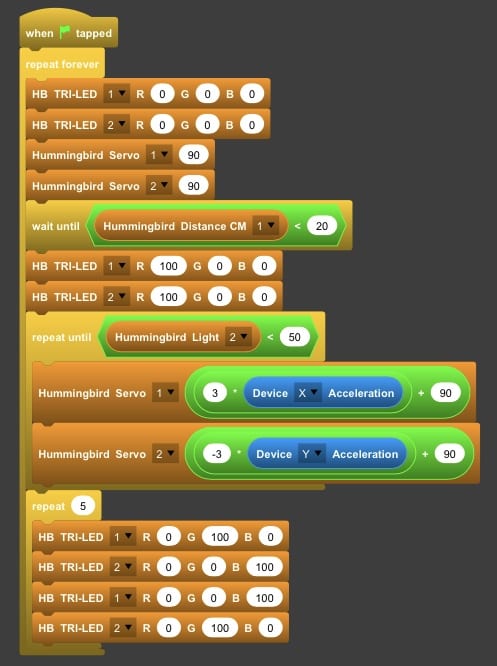
- Once the maze is activated and the game begins, we can change the color of the LEDs to alert the user that the game has started. We chose to make both LEDs red. These LED blocks should be inserted right below the wait until block.
- Finally, when the robot is idle and waiting for the ball to be placed at the start of the maze, the board should be level and the LEDs should be a different color to reflect the idle state. Place two LED blocks and two servo blocks (one for each port) above the wait until block to do this. Set the servos to 90 degrees, which should be level.
- It is finally time to reattach the maze to the robot! Tap the green flag and place the iPad level on a table. This will set both servos to 90 degrees. Then attach the maze and adjust the horns as needed so that the maze platform becomes level.
- Have fun playing your maze!