Register to receive free access to all teacher materials.

l Projects
Programming Language
Scratch
Subjects
Maker Tools
Grades
4-5, 6-8, 9-12
Objective & Learning Goals
Students will create an interactive game using the Hummingbird Robotics Kit and Makey Makey.
Standards
COMPUTER SCIENCE TEACHERS’ ASSOCIATION (CSTA)
CSTA Standards are split into different grade levels: 3-5, 6-8, and 9-10. Working with the Hummingbird Robotics Kit meets multiple standards across these grade-level delegations.
Visit this page for a more detailed explanation of how working with the Hummingbird Robotics Kit applies to meeting CSTA Standards.
Photo Gallery
To understand MaKey MaKey, spend two minutes watching their highly informative and entertaining video:
How does it work?
MaKey MaKey takes advantage of the fact that many things in the world are a little bit conductive: People, water, fruit, pencil lead, coins, play-dough, and much more. The MaKey MaKey connects to your computer and pretends to be a USB keyboard and mouse. It then takes impulses from alligator clips that you connect to conductive objects and to the MaKey MaKey board, and when you press two or more conductive objects together, it converts that into a keyboard press/mouse command.
How do you use it with Hummingbird?
Basically, MaKey MaKey + Hummingbird = Banana controlled robots. Hummingbird and MaKey MaKey are both USB devices, so connect both to a computer and let the fun begin! The easiest way to use them together is to use Snap! with Hummingbird. Snap! contains two critical blocks that make it very easy to use with MaKey MaKey: the ![]() block and the
block and the ![]() block. Just configure these blocks so that they’re sensing the key on the MaKey MaKey that you’ve attached to a banana, play-dough, etc, and make your Hummingbird code either start with that “key press” or use an if statement to decide to do something whenever that key is pressed. Read through the example to get an idea of exactly how this is done.
block. Just configure these blocks so that they’re sensing the key on the MaKey MaKey that you’ve attached to a banana, play-dough, etc, and make your Hummingbird code either start with that “key press” or use an if statement to decide to do something whenever that key is pressed. Read through the example to get an idea of exactly how this is done.
Example: Control a Robot with a Drawing!
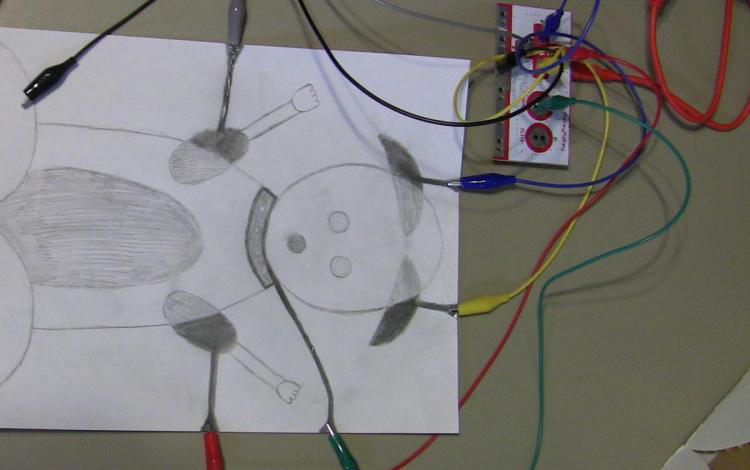
Our setup: a MaKey MaKey connected to a pencil drawing of our friendly dog robot. The MaKey MaKey has five alligator clips connecting to the drawing. We’ve made dark hot spots that have enough pencil lead to be conductive on the drawing’s arms, ears, and collar. The connections are as follows:
- Grey alligator clip connects the left arm hot spot to the down arrow key
- Red alligator clip connects the right arm hot spot to the up arrow key
- Blue alligator clip connects the left ear hot spot to the left arrow key
- Yellow alligator clip connects the right ear hot spot to the right arrow key
- Green alligator clip connects the collar hot spot to the space key
- The Black alligator clip connects common earth/ground to you – this is very important, if you don’t hold the black clip or connect it to you somehow, then you’re not making a complete circuit when you touch a hot spot.
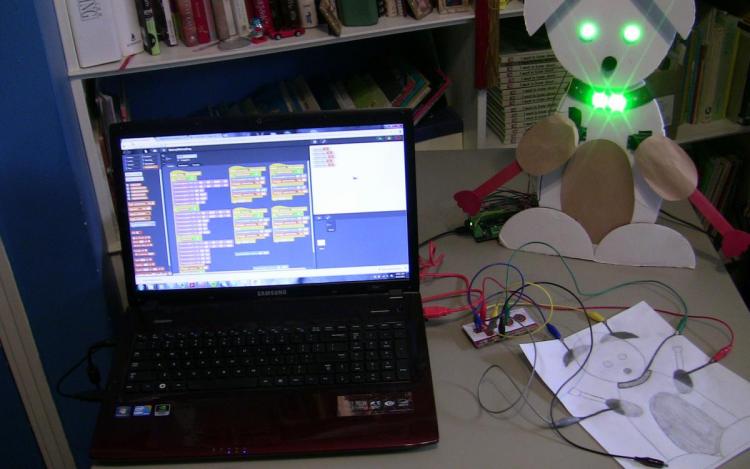
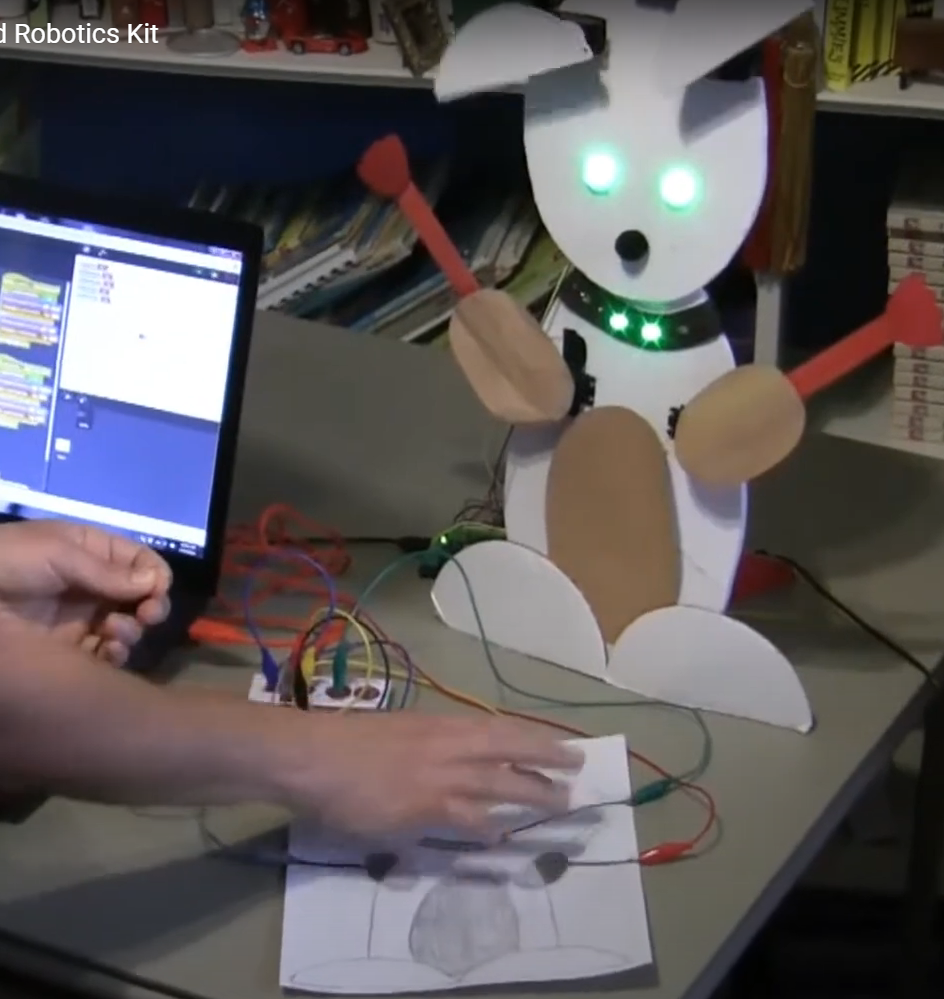
Our program uses the ![]() block to control the robot to do the following: When any of the arms or ears are touched on the drawing, that arm or ear moves up/down. Each time the collar is touched, the lights change from green to red to blue.
block to control the robot to do the following: When any of the arms or ears are touched on the drawing, that arm or ear moves up/down. Each time the collar is touched, the lights change from green to red to blue.
Here’s a snippet of the program responsible for controlling the right arm. Whenever the up arrow key is pressed, the program checks a variable we have defined called “rightArmState”. If the variable is 0, the arm goes down and the variable gets changed to a 1; if the variable is 1 the arm goes up and the variable is changed to 0. We also wait for a quarter second at the end to keep from triggering this code too often; the technical term for this is debouncing. If we didn’t debounce and touched the hot spot for a fraction of a second it might still trigger our code four or five times.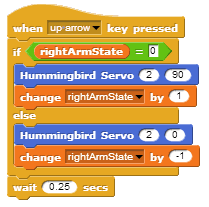
Watch the following short clip to see the full program in action: