Can you modify your spiral program so that the Finch stops when it detects an obstacle? Can you make the Finch keep going when the obstacle is removed?

l Projects
Print
Intermediate: Spirals with the Finch
Use Scratch or Snap! to draw spirals with the Finch during Hour of Code
Programming Language
Snap!
Teacher Note
For this activity, your students can program the Finch with Snap! using either laptops or Chromebooks. Snap! is a drag-and-drop programming languages, and students do not need any prior programming experience. To install and start using Snap! on a laptop or Chromebook, check out this tutorial.
Moving the Finch
Use the USB cord to connect the Finch to the computer. In order for the Finch to run a program, this cord must always be attached to the robot and to the computer.
Start by opening the snap-legacy.birdbraintechnologies.com. It should show that your Finch is connected. Select Snap! Level 4.
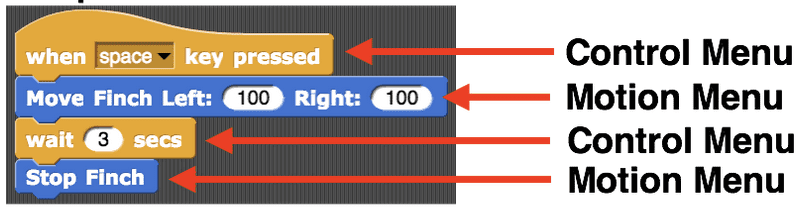
The Finch has two motors, one for each wheel. The Move Finch block starts these motors. The block requires two numbers. These numbers represent the speeds of the left and right motors. Each number can be any whole number from -100 to 100. This block makes the Finch start moving. Another Move Finch block is needed to stop it. To stop the Finch, use a Move Finch block with both motor speeds equal to 0. You can also use the Stop Finch block.

Try out the program below. It should move the Finch forward for three seconds. Then try several motor speeds between 0 and 100 in the first Move Finch block (keep the speeds of the left and right motors the same). What does it mean for the speed to be negative? Try several motor speeds between 0 and -100 (keep the speeds of the left and right motors the same).
Tip: You may need to carry the USB cord as the Finch moves. Otherwise, the cord may keep the Finch from moving and turning freely.
Turning the Finch
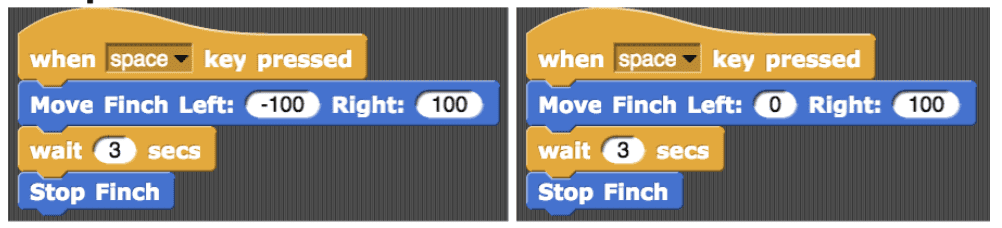
So far, the speeds of the left and right motors have been equal. When these speeds are equal, the robot moves in a straight line. When the speeds are not equal, the Finch will turn.
Try the two programs shown below. How are these two turns different? How can you make the robot turn in the other direction?
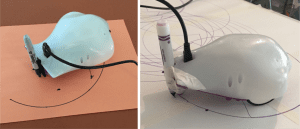
Write a program that makes the Finch move in a circle with the left wheel at 60 and the right wheel at 15. What is the approximate radius of the circle? You may want to attach a marker to the Finch as shown below.
Modify your program so that the left wheel moves at 60 and the right wheel moves at 50. What is the radius of the circle now?
Repeating Actions
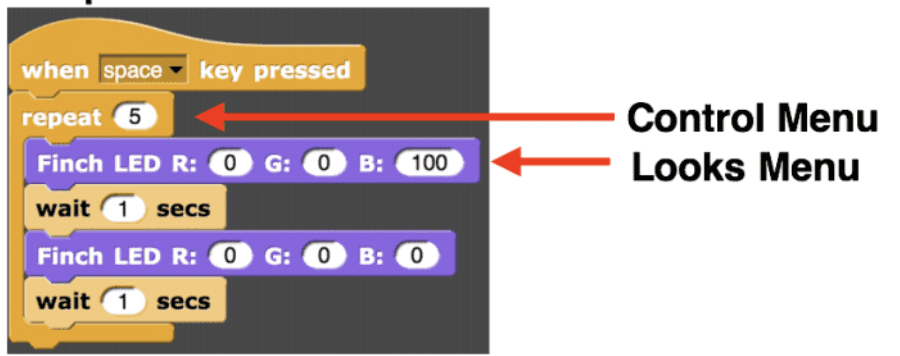
Next, try out a repeat block. You can find this block on the Control menu. The repeat block repeats whatever is inside if a specific number of times. For example, the script below makes the Finch beak blink on and off five times. Try it out!
Spirals with Finch
To make the Finch draw a spiral, you want to gradually change the speed of the right wheel. You can do this using a variable. To create a variable, go to the Variables menu in Snap! and click Create a Variable. The New Variable window will appear. Call the variable “speed” and click OK. After you create a variable, its value is shown in the top-left corner of the stage.
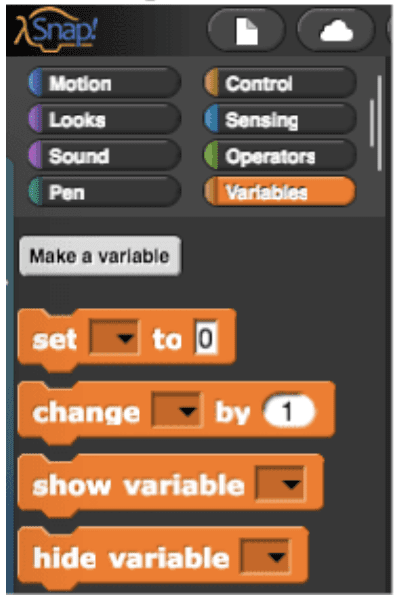
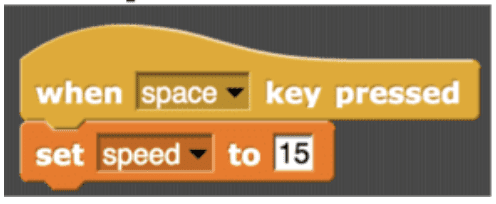
Before you use a variable in a program, you should always give it a value. This is called initializing the variable. To initialize the variable, use the set to block on the Variables menu. Be sure the click on the black arrow in this block to select the name of your variable.
You will use the repeat block to gradually increase your speed variable. An example is shown below. What will be the value of speed at the end of the script?
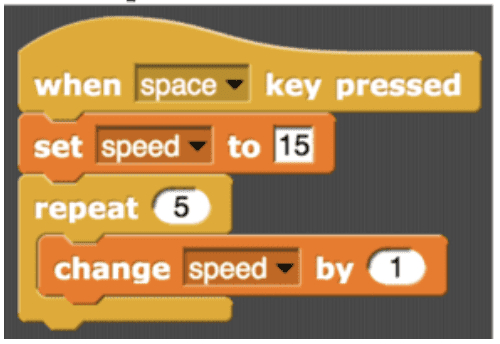
Modify this script so that the Finch moves for 1 second for each value of speed. The speed of the right wheel should be speed, while the speed of the left wheel should be fixed at 60. What number should you place in the repeat block to make the final value of speed equal to 50? Remember to stop the Finch at the end of the program.
Once you have a basic spiral, see what variations you can make!
Extension #1
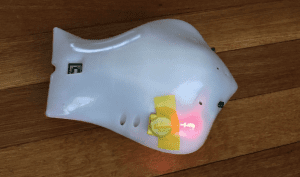 It is possible to attach a marker to the Finch, but it may be difficult to get a good picture of your spirals this way. Instead, attach a CR2302 battery to a small LED and tape it to the Finch over the right wheel.

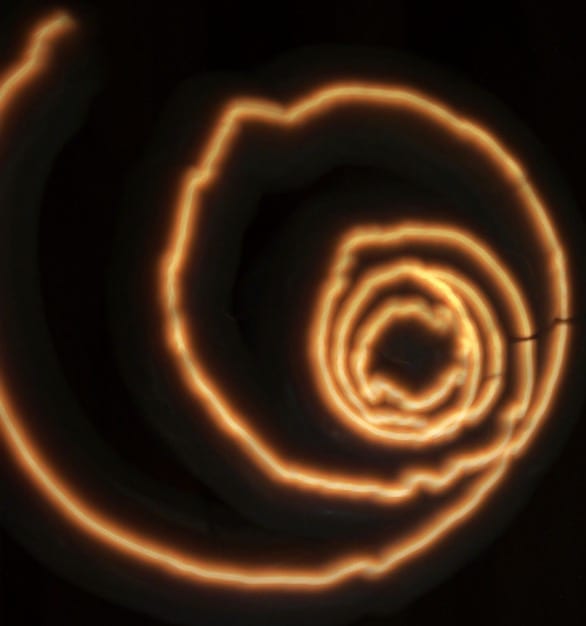
Now you can use a long exposure photograph to follow the “light trail” of the LED as the Finch moves. The picture below was taken with the Slow Shutter Cam app, but other methods of taking long exposure photographs can also be used (LongExpo is a free app). You will need to make sure that the camera is very still during the exposure, so tripod is a good idea if you have access to one. The light trail can also be a good way to measure the angle that the Finch is turning as you test and debug your program.
Extension #2
The Finch has two sensors that it can use to detect obstacles. You can use the blocks Finch Left Obstacle and Finch Right Obstacle to find out whether the Finch is detecting an object. These blocks are Boolean blocks, which means that the value of each block is either true or false. If an object is in front of the right obstacle sensor, then the Finch Right Obstacle block is true. Otherwise, it is false. Each obstacle sensor can detect objects about 1-4 inches from the sensor. Large, light-colored objects, such as cardboard boxes, make the best obstacles for the Finch.

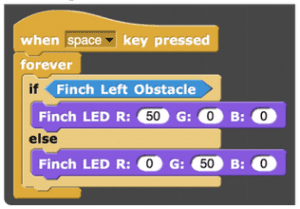
You can use these Boolean blocks in an if else block (Control menu). The if else block is very similar to the if block. If the Boolean block is true, the program runs the blocks in the top of the if else. Otherwise, the program runs the blocks in the bottom of the if else. For example, the program below turns the Finch’s beak red when an object is close to the left sensor. Otherwise, the beak is green.