Register to receive free access to all teacher materials.

l Projects
Print
Beginner: Through the Maze with the Finch Robot
Lead your Finch through a maze in this beginner Hour of Code project!
Programming Language
Snap! Jr.
Teacher Note
For this activity, your students can program the Finch with Snap! Level 1 using either laptops or Chromebooks. Snap! Level 1 is a very simple programming language, and students do not need any prior programming experience. To install and start using Snap! on a laptop or Chromebook, check out this tutorial.
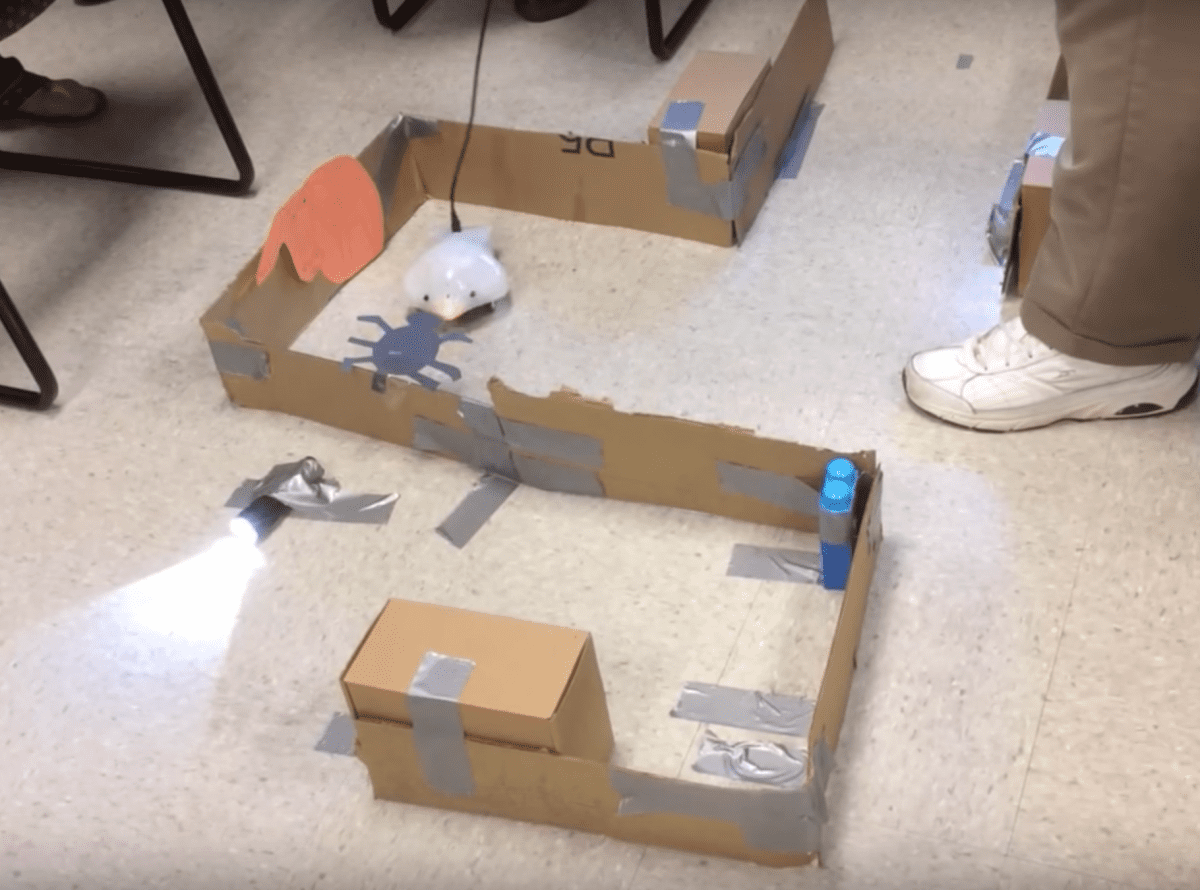
For this activity, students will need to build a small maze for the robot. They can build a maze using cardboard (picture below), or they can outline a course with tape or cups/cones. Each group of students will also need a stopwatch.
Moving the Finch
Use the USB cord to connect the Finch to the computer. In order for the Finch to run a program, this cord must always be attached to the robot and to the computer.
Start by opening the Birdbrain Robot Server (if you are on a laptop) or the Finch Connection App (if you are on a Chromebook). It should show that your Finch is connected. Then select Snap! Level 1 and open the program.
Watch this video to learn how to use Snap! Level 1 to make the Finch move and turn.
The four arrow blocks move the Finch. The up arrow moves the Finch forward for one second. The down arrow moves the Finch backward for one second. The left and right arrows turn the Finch left and right.
Starting with the when key pressed block, try creating a program using six of the arrow blocks. How do you think the Finch will move when you run the program?
Tip: You may need to carry the USB cord as the Finch moves. Otherwise, the cord may keep the Finch from moving and turning freely.
Through the Maze
Now that you know how to make the Finch move, you can help it to navigate through a maze. When setting up your maze, add a few twists and turns to make it more challenging! To create your maze, you can use cardboard boxes, tape, or cups/cones. The picture below shows a sample cardboard maze created by teachers at Longwood University’s Institute for Teaching through Technology and Innovative Practices (ITTIP) program.
First, you will write scripts that will let you run the robot with remote control. For example, maybe you want the robot to move forward when you press the up arrow. When writing your scripts, think about what movements the Finch will need to make. What keys can you use to control the Finch?
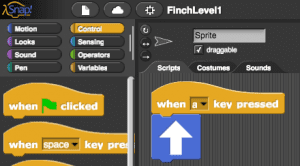
Tip: You can use the when key pressed block to make the Finch move in different ways. This block is on the Control menu. When you add the when key pressed block, it will automatically say “when space key is pressed.” You can click the drop down arrow to choose which key you want to use. For example, the picture below shows a program that will make the Finch move when the ‘a’ key is pressed.
When you complete your scripts, use them to guide the robot through the maze. Use a stopwatch to measure how long it takes for the robot to complete the maze. Write this number down, you will need it later.
Next, write a program that enables the robot to complete the maze autonomously. This means that the robot must move through the maze on its own. You may press a key to start the script, but after that, you may not use the keyboard or move the robot. Be sure to test your program often as you add blocks to it. Also, save your work frequently!
When you complete your second program, use a stopwatch to measure how long it takes for the robot to complete the maze autonomously. If you have time, try to make the robot complete the maze as fast as possible.
Compare these two ways of completing the maze. Which is faster, remote control or autonomy? Which would work better for a new maze?
Extension
Try to use Snap! Level 2 or Snap! Level 3 to write a program to complete the maze. Can you complete the maze more quickly?