Register to receive free access to all teacher materials.

l Projects
Programming Language
Snap!, Scratch
Teacher Note
For this activity, each group of students will need a computer or Chromebook and a Hummingbird kit. They will also need a box, duct tape, a cutting tool, basic art supplies, and a small, light ball. Miniature beach balls or small stuffed balls work well.
For this activity, your students can program the Hummingbird with Snap! using either laptops or Chromebooks. Snap! is a drag-and-drop programming languages, and students do not need any prior programming experience. To install and start using Snap! on a laptop or Chromebook, check out this tutorial.
Getting Started
In this activity, you will build your own game! An example is shown in the video below, but you will be able to customize your game. In this game, the player throws a ball into a box. When the user “gets a basket,” the game will increase the score and turn on some lights.
Building the Basket
The first step to creating your game is to build the basket. For this part, you will need a box, a book, the Hummingbird board, a light sensor, and some tape.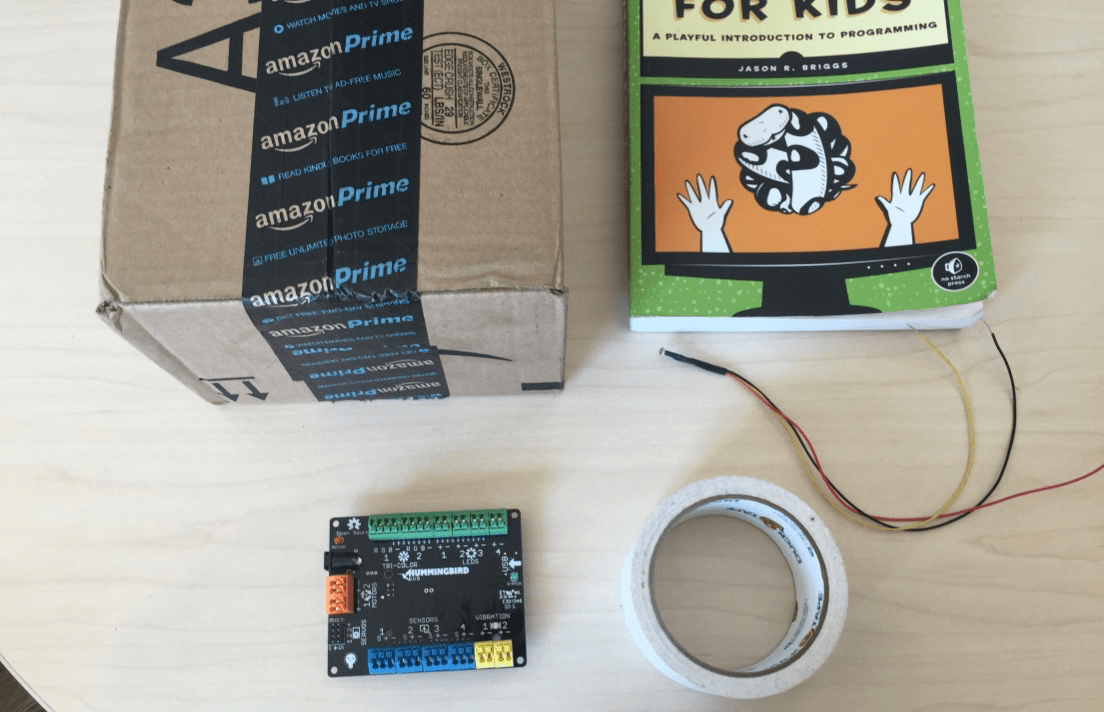
Your kit may contain more than one sensor, so make sure that you use the light sensor. It looks like this: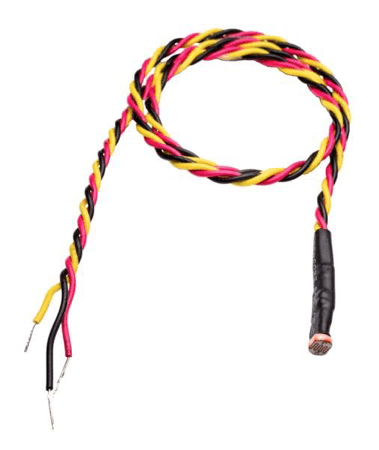
Start by cutting the top off of the box. Then place the light sensor through one corner of the box. You may need to use a pencil or pen to make the hole a little bigger. Use a little tape to secure the light sensor in the corner of the box, but make sure not to cover the top of the sensor.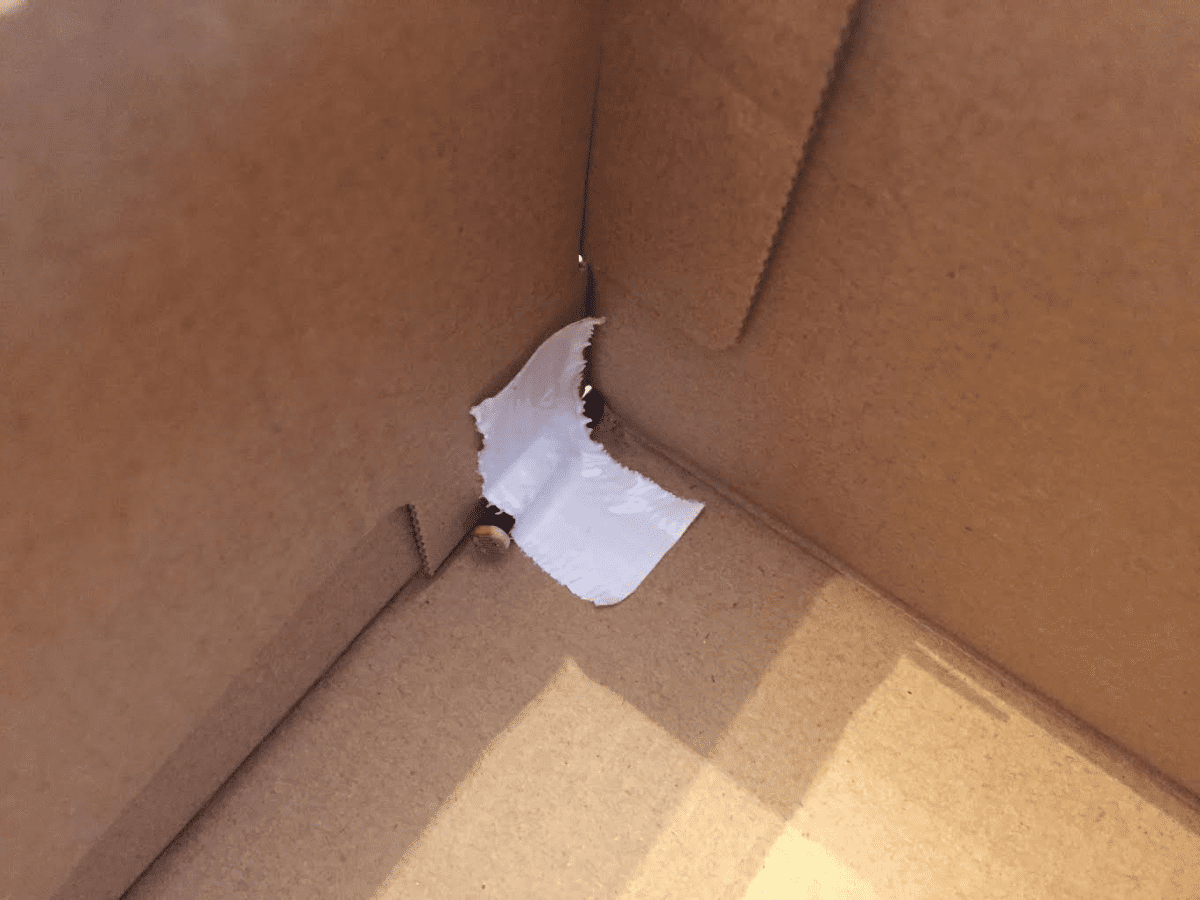
Next, connect the light sensor to the Hummingbird board. The board has four ports labelled “SENSORS.” You should attach the light sensor to the sensor port that has a “1” above it. The red wire should be connected to ‘+,’ the black to ‘-,’ and the yellow to ‘S.’ If you are having trouble, this video may be helpful.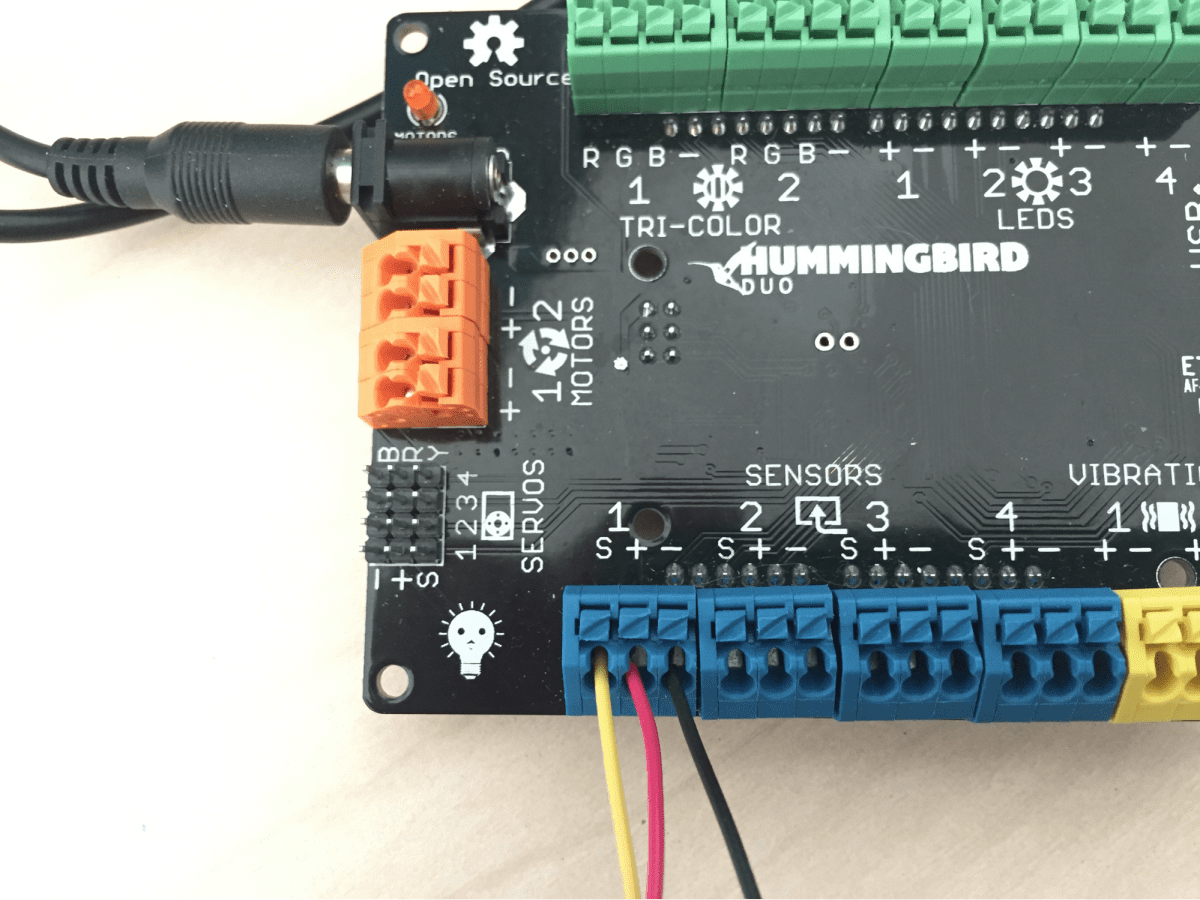
Set a book underneath one end of the box so that the ball will roll down toward the light sensor.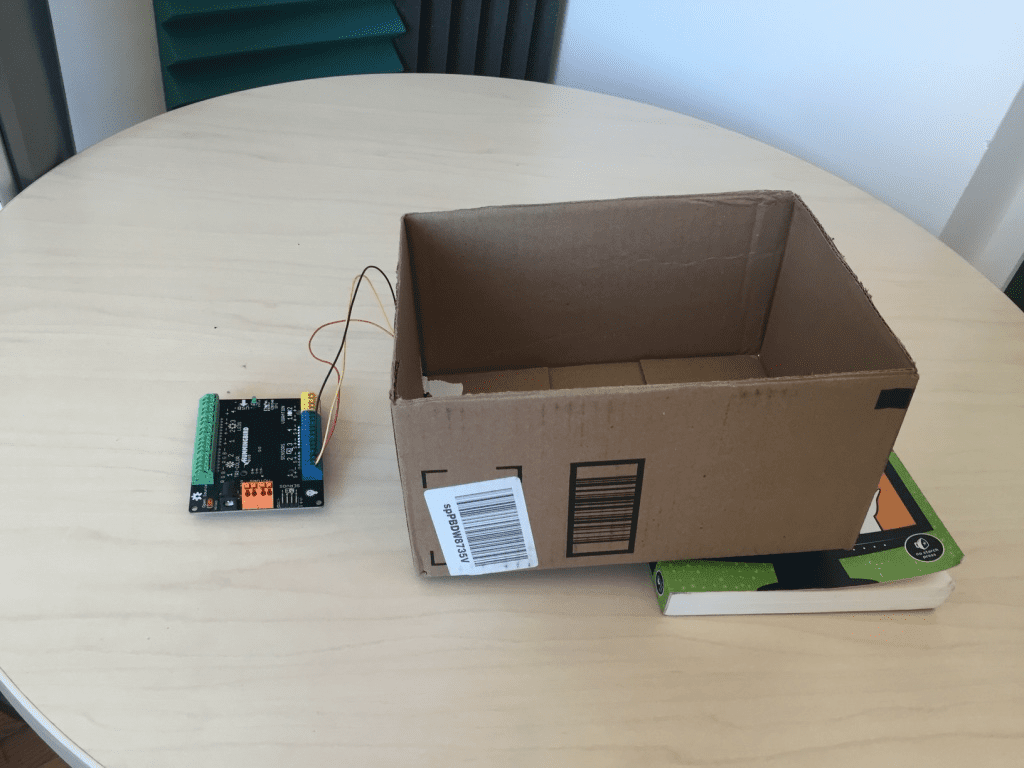
Writing the Program
Connect the power cord and the USB cable to the Hummingbird. The USB cable goes to your computer, and you should plug in the power cord.
Start by opening the Birdbrain Robot Server (if you are on a laptop) or the Hummingbird Connection App (if you are on a Chromebook). It should show that your Hummingbird is connected. Then open Snap! or Scratch; your teacher will tell you which one you should use.
Find the block that will tell you the value of the light sensor. In Snap!, this is the Hummingbird Light block. In Scratch, it is called HB light sensor. Drag this block into the Scripts area. The number in the block is the Hummingbird sensor port to which the light sensor is attached. Your sensor should be connected to port 1.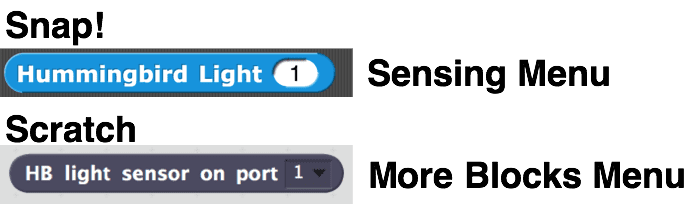
Make sure the basket is empty, and then click on the light sensor block. You should see a number between 0 and 100 appear. This is the amount of light that the sensor is reading in your room. Write down this number.
Next, place a ball in the basket and click on the light sensor block. You should see a smaller number. This is the amount of light that the sensor reads with the ball in the basket; the ball is blocking some of the light. Write down this number.
Find the mean (average) of the two values that you have written down. This will be the threshold for your light sensor; write it down. A threshold is a value that a robot uses to make a decision. In this case, the robot has to decide whether or not the ball is in the basket. When the value of the light sensor is less than the threshold, the player has made a basket. Otherwise, the basket is empty.
You can use the if block to make a decision. This block can be found on the Control menu. The if block has a space in the middle that can hold other Scratch blocks. In addition, the if block contains a hexagonal space. This space requires a Boolean block. A Boolean block is a block that can be either true or false.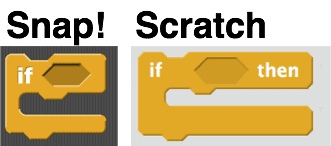
One way to use the light sensor in a program is to use its value to create a Boolean block. You can do this using the two blocks shown below, which are found on the Operators menu.
In this case, we want to check if the value of the light sensor is less than the threshold. The threshold is 30 below, but your threshold may be different.
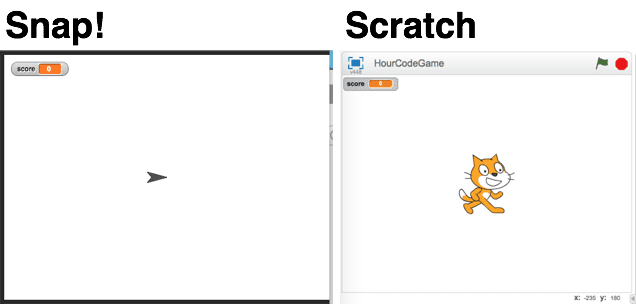
If the value of the light sensor is less than the threshold, we know the player made a basket! When this happens, they should score a point. To keep score, we need to create a variable. Go to the Variables menu in Snap! (Data menu in Scratch) and click Create a Variable. The New Variable window will appear. Call the variable “score” and click OK. After you create a variable, its value is shown in the top-left corner of the stage.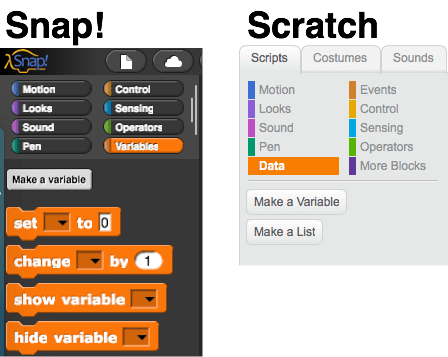
Before you use a variable in a program, you should always give it a value. This is called initializing the variable. To initialize the variable, use the set to block on the Variables/Data menu. Be sure the click on the black arrow in this block to select the name of your variable. We will use the spacebar to start our program, and we want the user’s score to start at 0.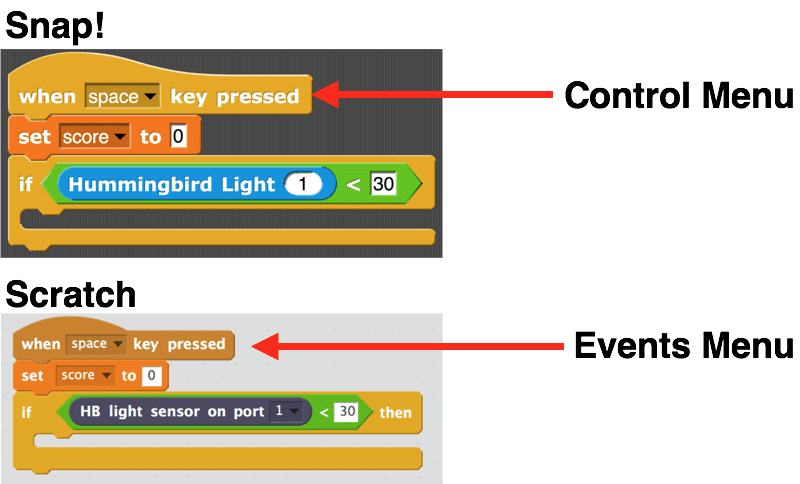
When a script reaches an if block, it checks the value of the Boolean block inside it. If the value is true, then the script runs the blocks inside the if block. If the value of the Boolean block is false, then the script skips the blocks inside the if and moves on to whatever is below the if block. Here, if the ball is in the basket, we want to increase the score by 1.
You have a very useful if block. You can decide whether the ball is in the basket and increase the player’s score. However, when you run this script, the decision will only be made once. You actually want to repeat this decision over and over again to keep checking if the ball is in the basket. You can do this using a forever loop, which you can find in the Control menu. This loop repeats the blocks inside it until you press the stop sign to stop the program.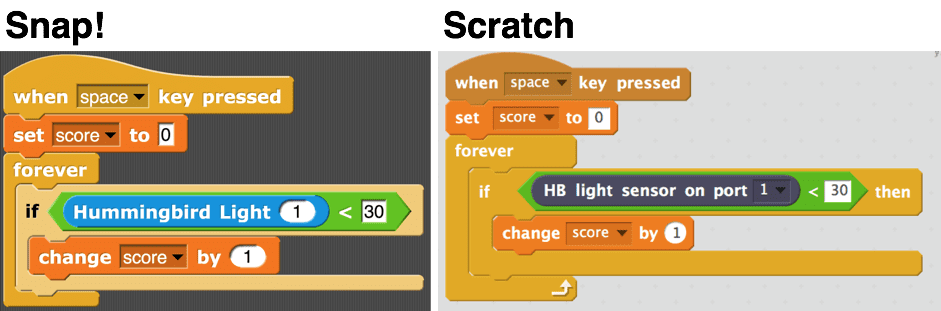
Go ahead and press the spacebar to run your program. You will notice a problem – when the ball is in the basket, the score keeps going up!
After a player gets a basket, you need to stop the program until someone removes the ball. You can do this using the ask and wait block (Sensing menu). This block shows the user some text and then stops the program until the enter key is pressed. You can also have the user enter words or numbers, but we don’t need to do that here.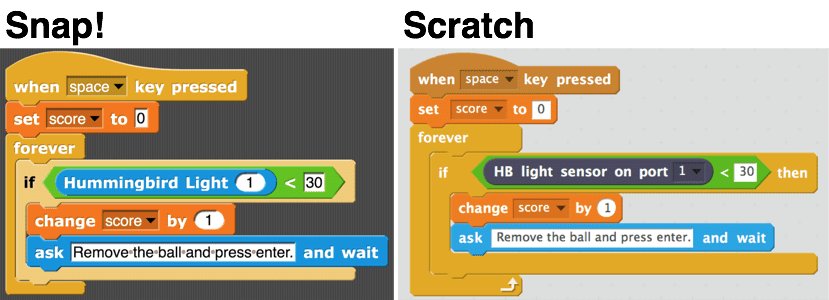
Try out your program! If you have trouble, try checking the threshold for the light sensor. If the light inside your room has changed, you may need to change your threshold.
Adding Lights
Once you have a basic program, you can add some lights that turn on when the player makes a basket. Get two tri-color LEDs from your Hummingbird kit. The tri-color LED looks like a small light bulb with four wires.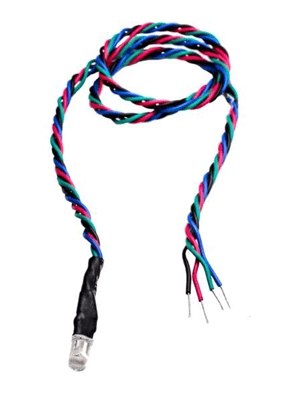
Attach the tri-color LEDs somewhere on your basket. Each tri-color LED can be attached to one of the two ports labeled “TRI-COLOR” on the Hummingbird board. The four wires of the tri-color LED are red, green, blue, and black. The black wire should be connected to the ‘-’ terminal. The red wire should be connected to the ‘R’ terminal, the green to the ‘G’ terminal, and the blue to the ‘B’ terminal.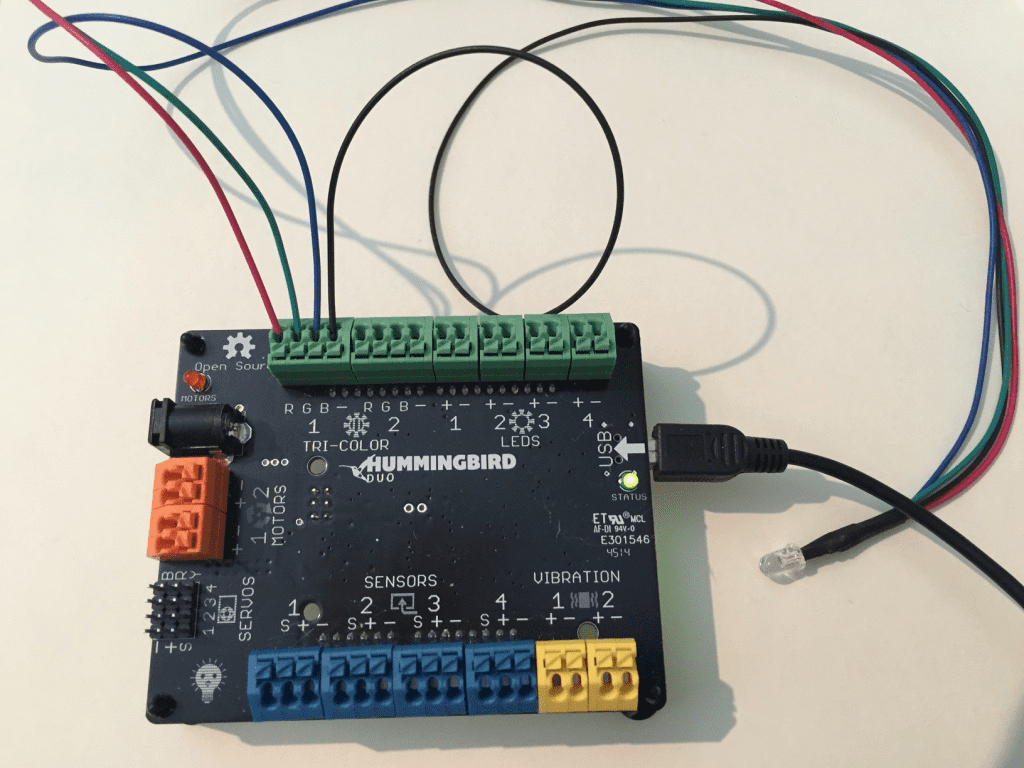
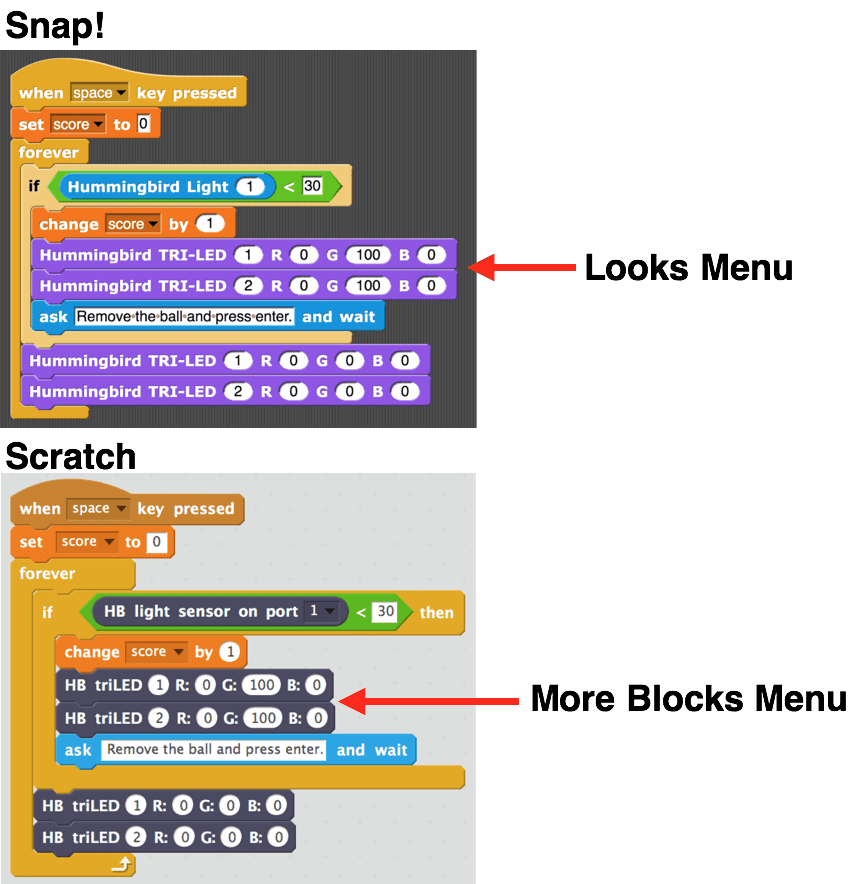
The tri-color LED actually has three tiny light elements inside it. One is red, one is green, and one is blue. This is important for programming the tri-color LED. The Hummingbird TRI-LED (Snap!) or the HB triLED (Scratch) block is used to control a tri-color LED. This block requires four numbers. The number on the left is the number of the port to which the tri-color LED is attached (1 or 2). The other numbers are labelled R, G, and B. R controls the amount of red light from 0 (none) to 100 (maximum brightness). G and B control the amount of green and blue light, respectively, from 0 to 100.
Start from the sample code below and modify your program to make the LEDs light up in your favorite color when the player gets a basket. In each program, the two LED blocks outside the if block are there to turn the lights off when the user resets the game. To turn an LED off, the R, G, and B values must all be set to 0.
Now that you have a working game, take some time to think about how you want to make it better. Maybe you can add animations on the screen, add music, or make the lights blink! You can even decorate your game.
Extension #1
Add a servo motor to your game! Attach a servo motor to one side of the basket. A servo motor is a motor that moves to a particular angle. The Hummingbird servo motor can rotate to any angle from 0° to 180°. When using the servo motor, you must also use the AC power adapter (or a battery pack). Otherwise, the Hummingbird board will not have enough power to run the motor.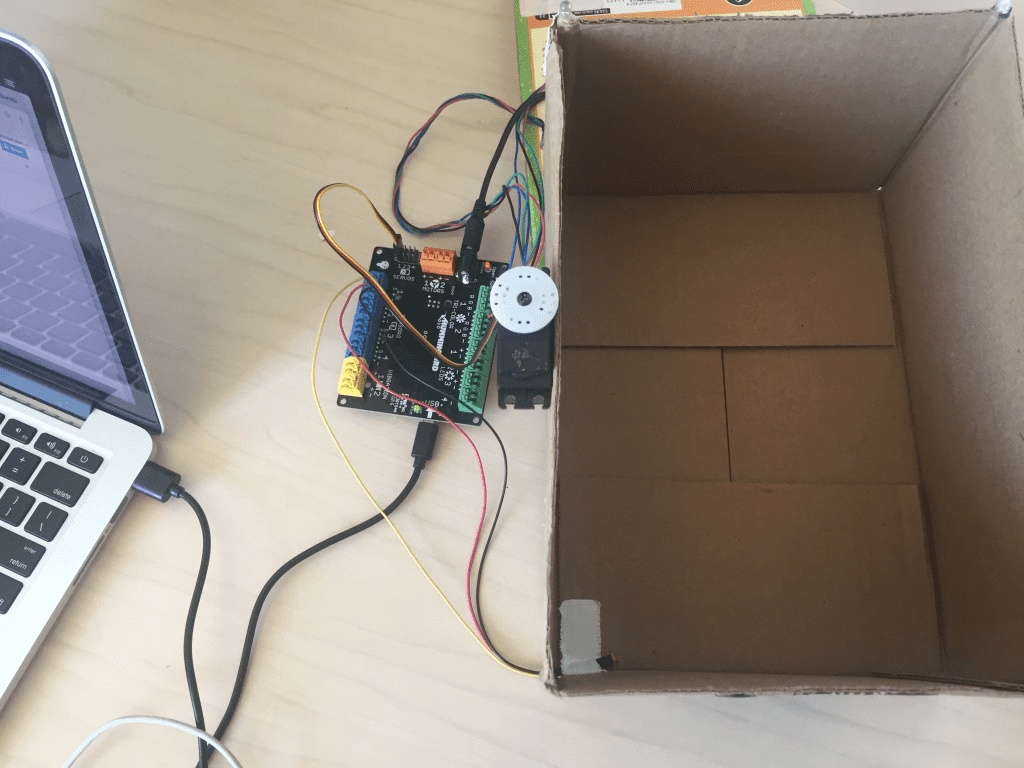
The servo motor has a small plug. This plug should be placed on one of the four male servo connectors on the Hummingbird board. The black wire should be connected to the ‘-’ pin, the red wire to the ‘+,’ and the yellow wire to the ‘S.’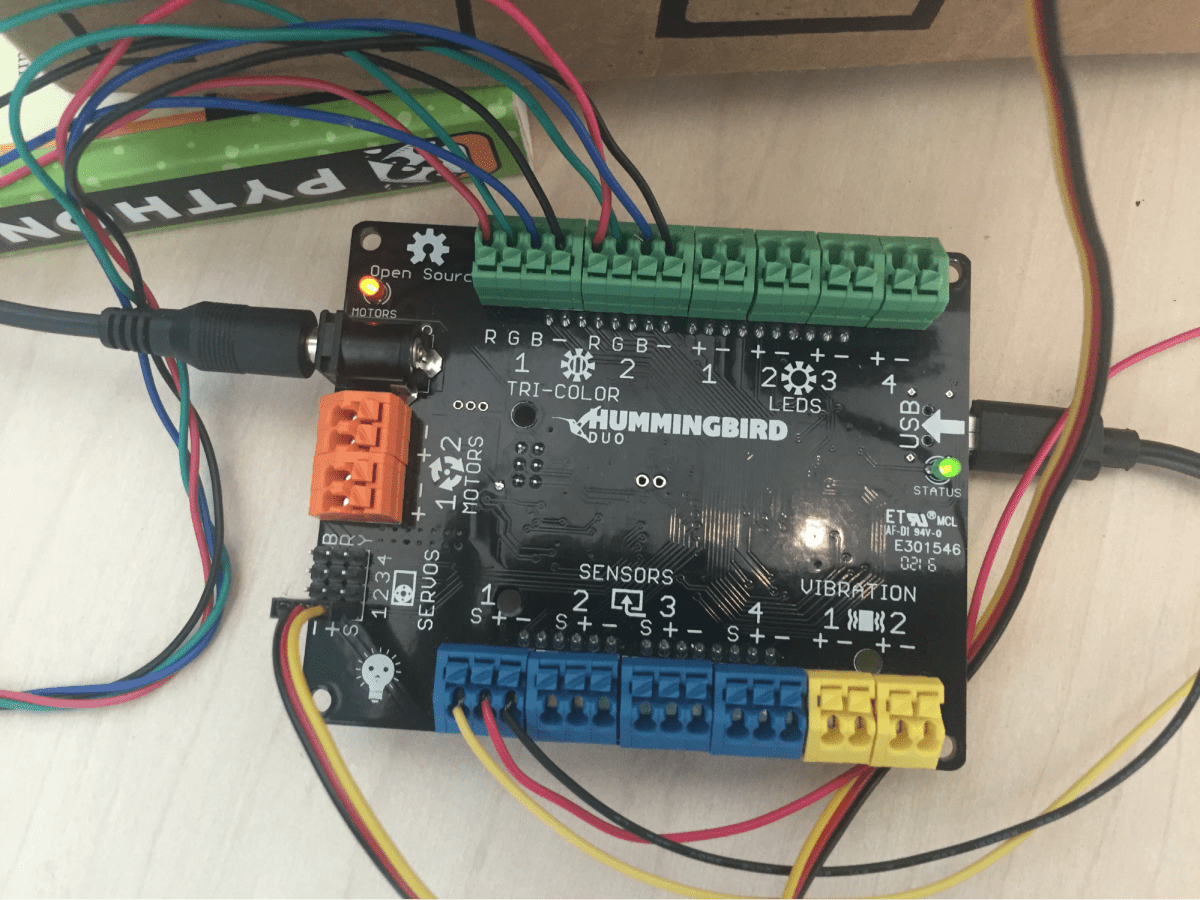
In Snap! or Scratch, set your servo motor to 90°. You can do this using the block for the servo motor, which is Hummingbird Servo in Snap! and HB servo in Scratch. The number on the left is the port attached to the servo (1-4) and the second number is the angle (0° to 180°). The command below should move a servo motor attached to port 1 to 90°. You can click on the block to run it.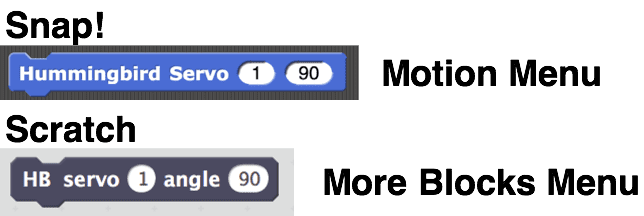
Once the motor is set to 90°, glue a popsicle stick (or more than one!) to the servo motor to block the basket. Now the player can only make a basket when it is not blocked.
The script below will make the motor move in a regular pattern, but you can change it to move the motor any way you like. How can you make your game challenging without making it impossible to get a basket?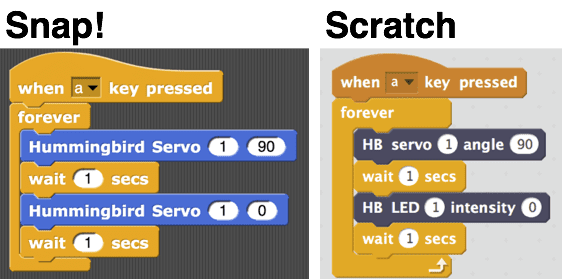
Extension #2
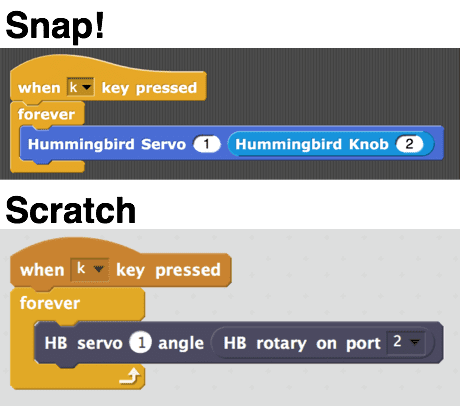
Make it a two-person game! This extension will show you how to do this with a second sensor, the rotary knob. If you don’t have this sensor in your kit, you can use different keys to send the servo to different angles. Then a second person can try to block the player’s basket!
To use the rotary knob to control the position of the servo, connect the rotary knob to sensor port 2.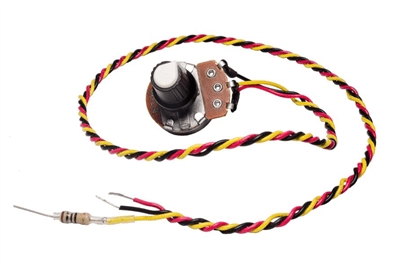
The value of this sensor ranges from 0 -100. The scripts below will enable you to use the knob to move the servo from 0° to 100°. You can find the block for the rotary knob on the Sensing menu in Snap! and the More Blocks menu in Scratch. Can you figure out how to use blocks from the Operators menu to make the servo move all the way from 0° to 180°?