Register to receive free access to all teacher materials.

l Projects
Print
TETRIX with Hummingbird
Use TETRIX sets with the Hummingbird to create an autonomous rover or walking robot.
Programming Language
Arduino, BirdBlox
Most Hummingbird robots are created from craft materials and cardboard, but sturdier robots can be made from plastic, wood, and metal. In this tutorial, we will show you how to use TETRIX sets to create an autonomous rover or walking robot. To complete this tutorial, you will need a Hummingbird Duo kit, a TETRIX kit, and a battery pack.
Note: This is an advanced tutorial. It assumes that you are familiar with the Hummingbird and can program in the Arduino programming language.
Hummingbird Rover
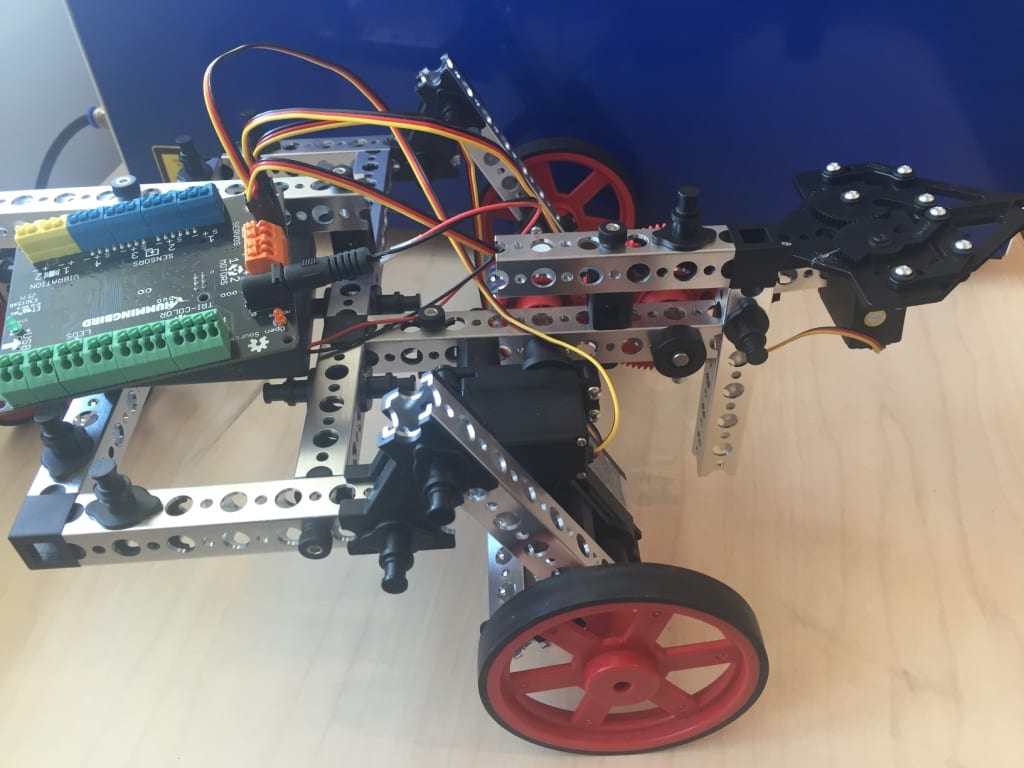
The TETRIX Prime Starter Set includes building instructions for three robots. To use this kit with the Hummingbird, start by building the Buggee Bot. You do not need to attach the battery pack (Step 9). You also will not be using the controller or the receiver in this tutorial. Instead, your rover will be controlled by the Hummingbird.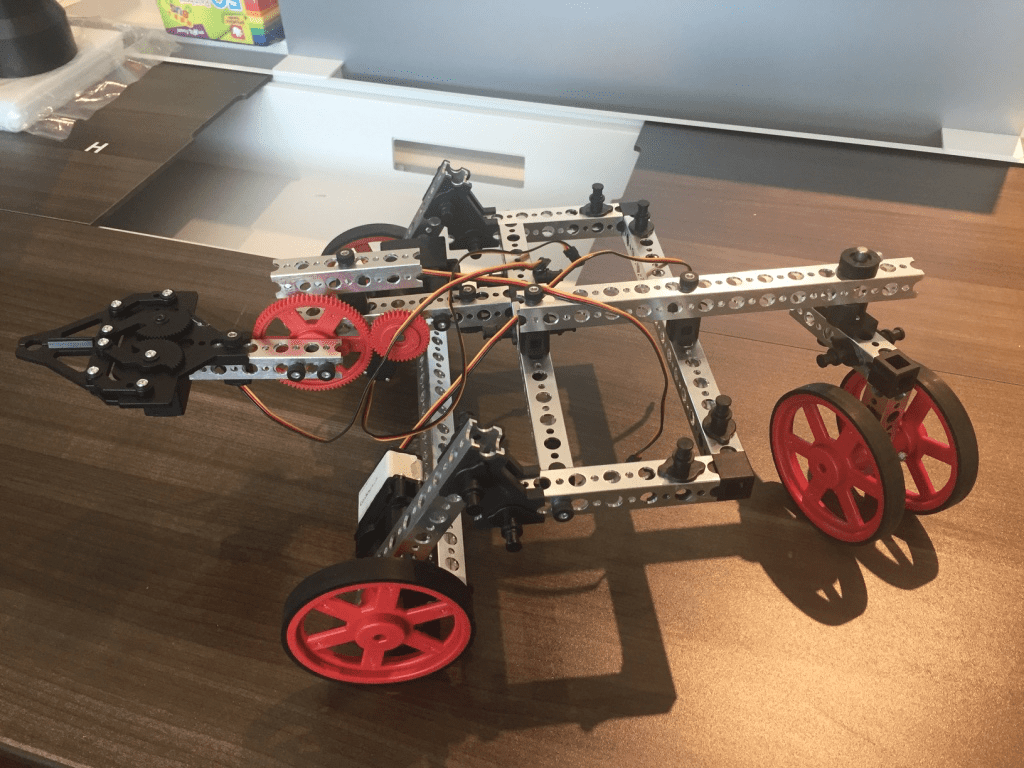
Attach the four servos of the Buggee Bot to the four servo ports on the Hummingbird. The continuous rotation servos should be connected to ports 1 and 2, the arm servo to port 3, and the gripper servo to port 4. Go ahead and connect the battery pack and place it underneath the Hummingbird board.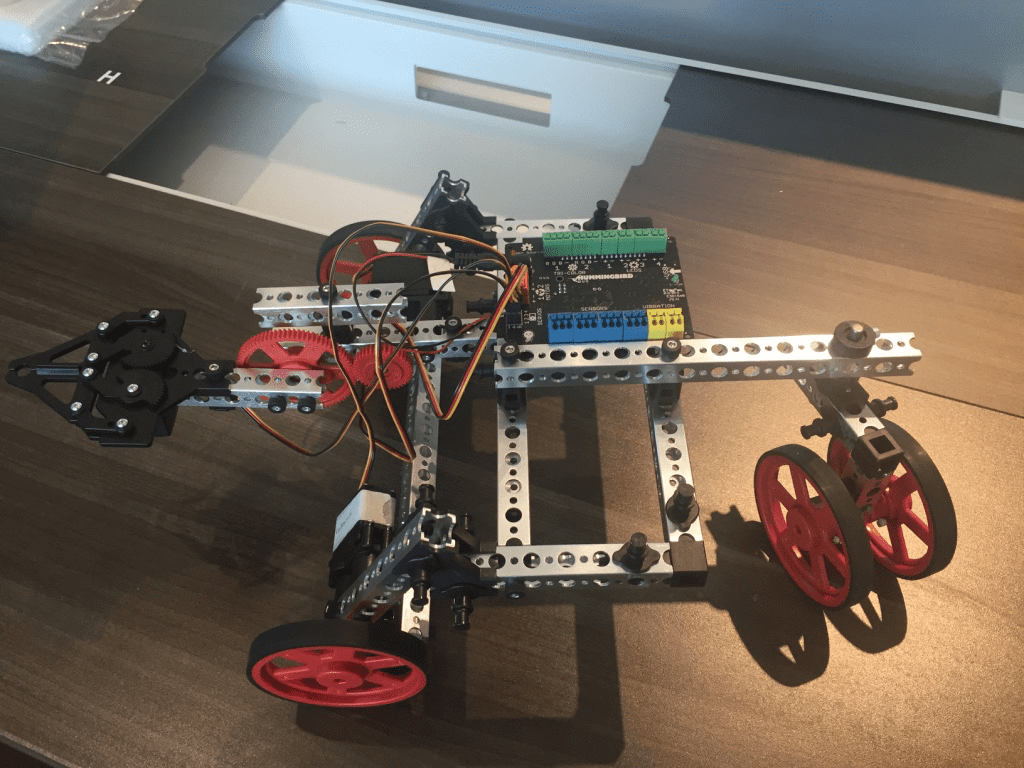
Next, add sensors to the rover. Construct a sensor mast with two tri-color LEDs, a distance sensor, and a sound sensor. Ours also contains a sensor for line tracking; for more information, see this tutorial.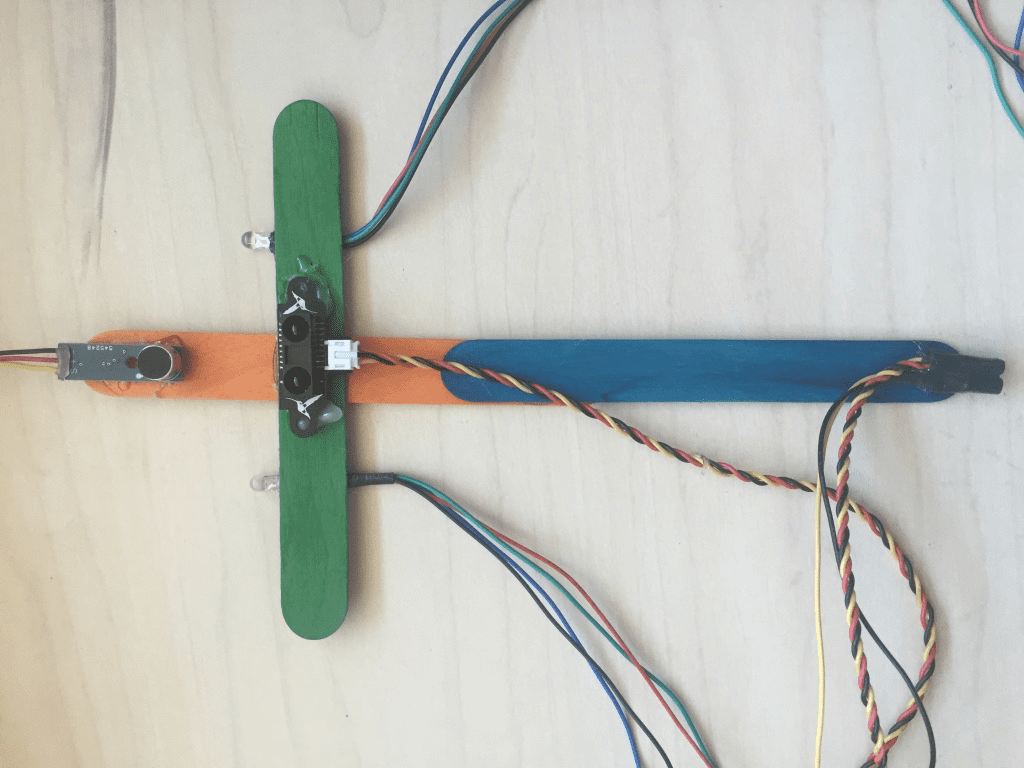
Use TETRIX parts to add a vertical strut to the front of the rover, as shown below. Use a zip tie to fasten the mast to the vertical strut, and then connect your sensors and LEDs to the Hummingbird. The light sensor for line tracking should be attached to sensor port 1, the distance sensor to port 2, and the sound sensor to port 3. You may also need to use zip ties to control the many wires going to the Hummingbird.
Programming the Rover
In this section, you will write an Arduino program to control your robot. When this program is finished, the robot should track a line when there is no obstacle in front of it. The robot must stop when it senses an obstacle. When the robot is stopped, you should be able to clap or make a loud sound to open or close the gripper.
Open a new Arduino file. Include the Hummingbird.h file and declare a variable for the Hummingbird board.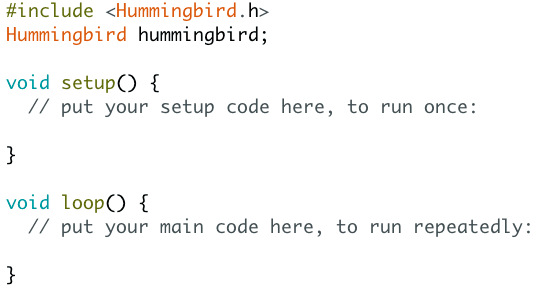
This will be a complex program, so it is a good idea to use functions to organize our code. We will start by writing functions to control the gripper and turn the robot.
The gripper servo is attached to servo port 4 on our robot. With a little trial and error, we found that the servo angle is 0 when the gripper is closed and 70 when it is open. We also declared a global Boolean variable to keep track of whether the gripper is open or closed. The delay is included in each function to give the gripper time to move to its new position.![]()
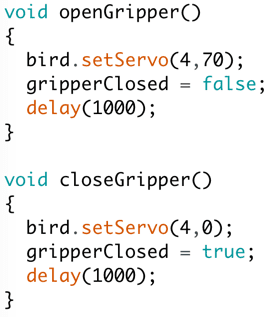
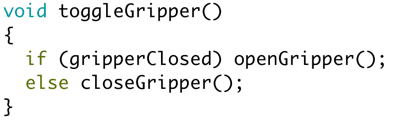
Once you have functions to open and close the gripper, create a function called toggleGripper(). This function should open the gripper if it is closed and close the gripper if it is open. Later, we will use this function to control the gripper with the sound sensor. Make sure to initialize the state of the gripper in the setup() function.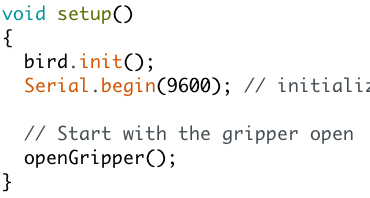
The continuous rotation servos that control the wheels are attached to servo ports 1 and 2. Even though these servos rotate 360°, we will control them using the setServo() method. A continuous rotation servo is off when it is set to 90°. Write a function to stop the robot.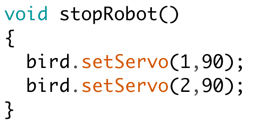
You can turn a continuous servo on by setting it to 0° or 180°. The position of your motor in the robot will determine which direction is forward and which is backward. For our robot, setting servo 2 to 0° makes the robot turn right. Experiment to find out how to turn your robot to the right and write a turnRight() function.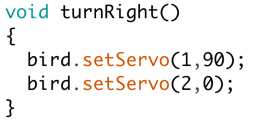
Next, write a function to turn your robot to the left. Don’t forget to test your functions!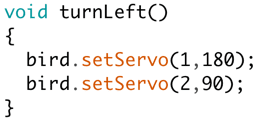
Declare global variables to hold the thresholds for the light, distance, and sound sensors. Within the setup() function, initiate a serial connection to print sensor values to the screen.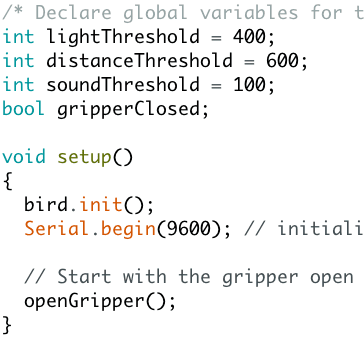
In the loop() function, print the values of the three sensors to the serial monitor.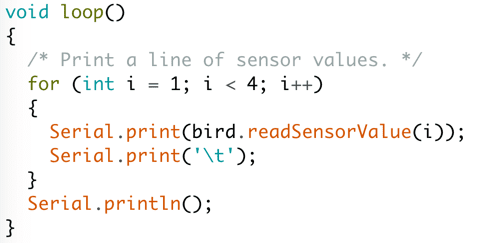
Run the program and use the sensor values to choose appropriate thresholds for the distance and sound sensors. To see the printed sensor values, click on the magnifying glass in the upper right corner of the Arduino window. This will open a window that displays the data values.
The last function that we need for this project is a function to track a line. Line tracking is covered in this tutorial, so we will cover only the basics here. First, add a line to the setup function to turn on the LED that is part of the line tracking sensor. With the LED on, examine the light sensor reading over the black line and over the light surface. Choose a threshold that is roughly halfway between these values.
To track the left side of a black line on a light surface, the robot should turn left when it is over the black line (less light reflected) and right when it is over the light surface (more light reflected). Use your turning functions to write a function named trackLine() that follows the left side of a black line.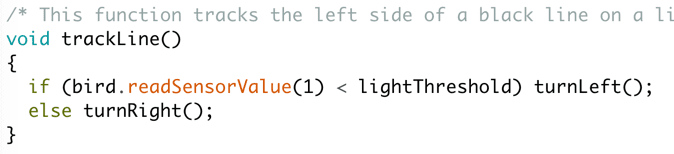
You’re almost done! The last steps involve modifying your loop() function to produce the desired robot behavior. The functions that you have already written will help you do this. Modify your loop function so that the robot tracks a line when there is no obstacle in front it. Remember that the value of the distance sensor is larger when there is an obstacle close to it.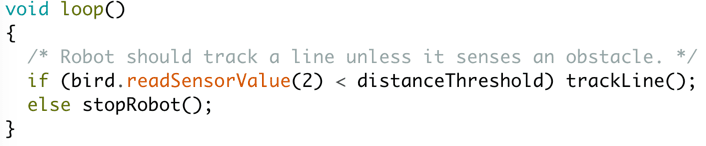
Finally, nest another if statement within the else that contains stopRobot(). If the robot detects a loud sound, it should toggle the gripper. A complete version of our code is here, but remember that your robot may be slightly different.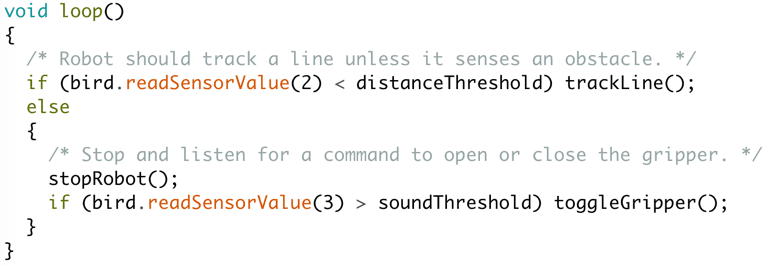
Congratulate yourself and have fun creating courses for your robot!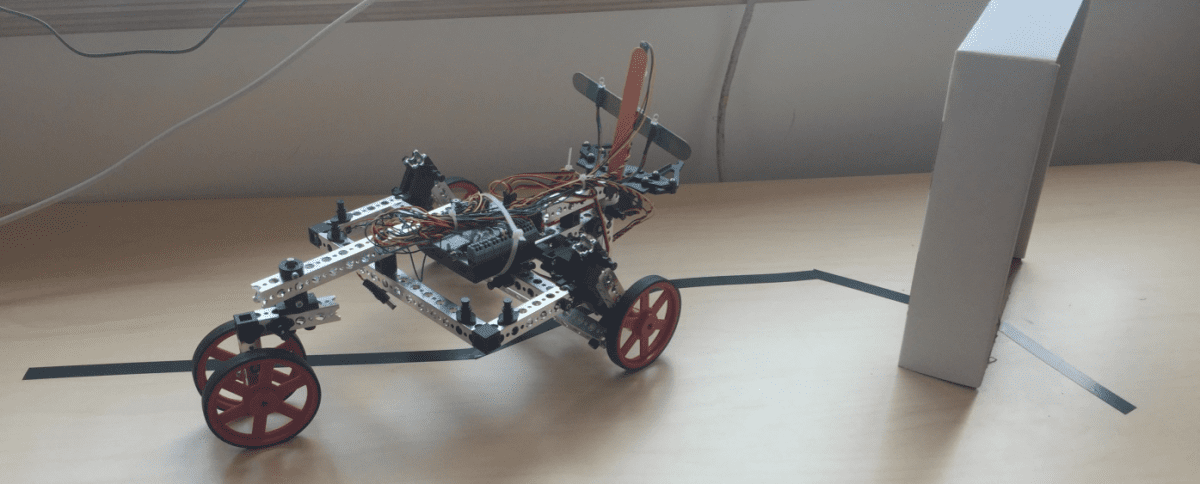
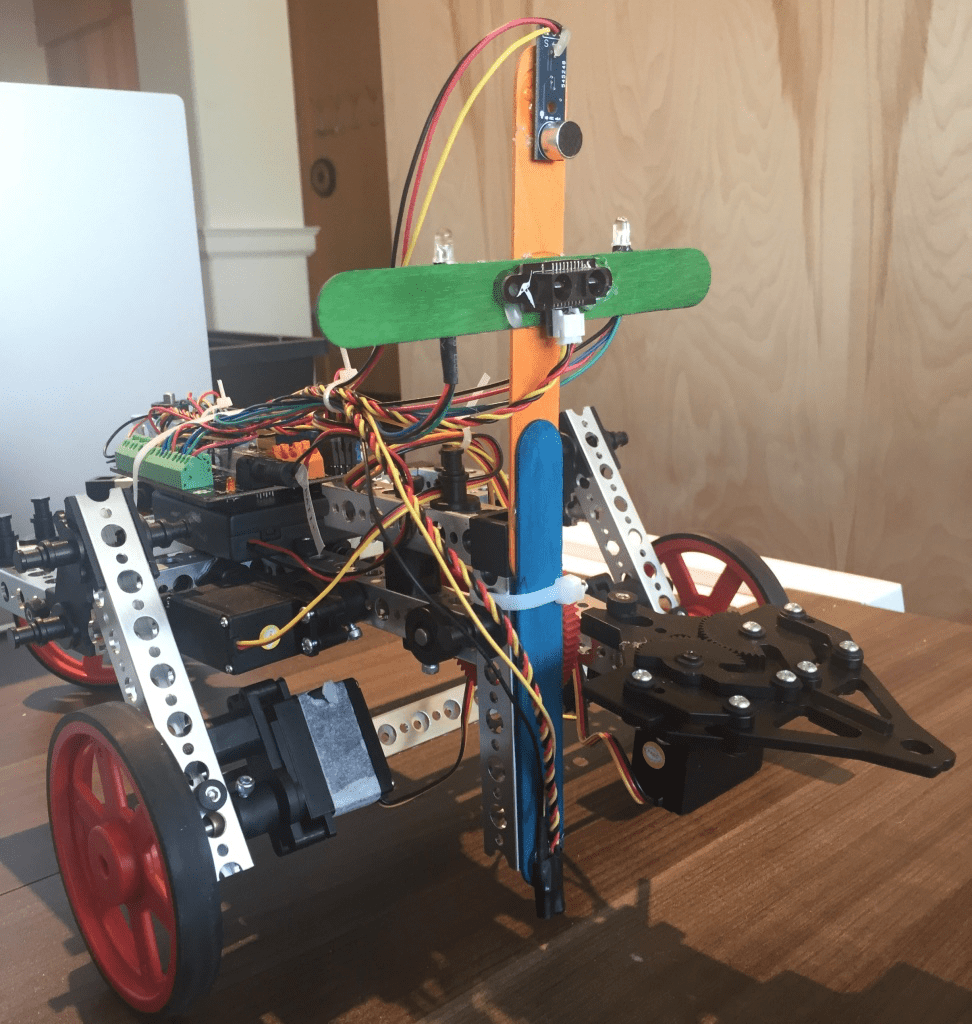
Hummingbird Walker Bot
The TETRIX PRIME Expansion Set contains a number of parts that can be used to create robots with linkages. A linkage is a set of rods or links that are connected by joints. As an example, build the Walker Bot according to the directions included in the expansion set. This robot uses a single continuous rotation servo that moves the back legs of the robot. The front legs of the robot are coupled to the back legs via linkages. This means that a single motor controls all four legs! Since there is only one motor, the robot can only move forward and backward; it cannot turn.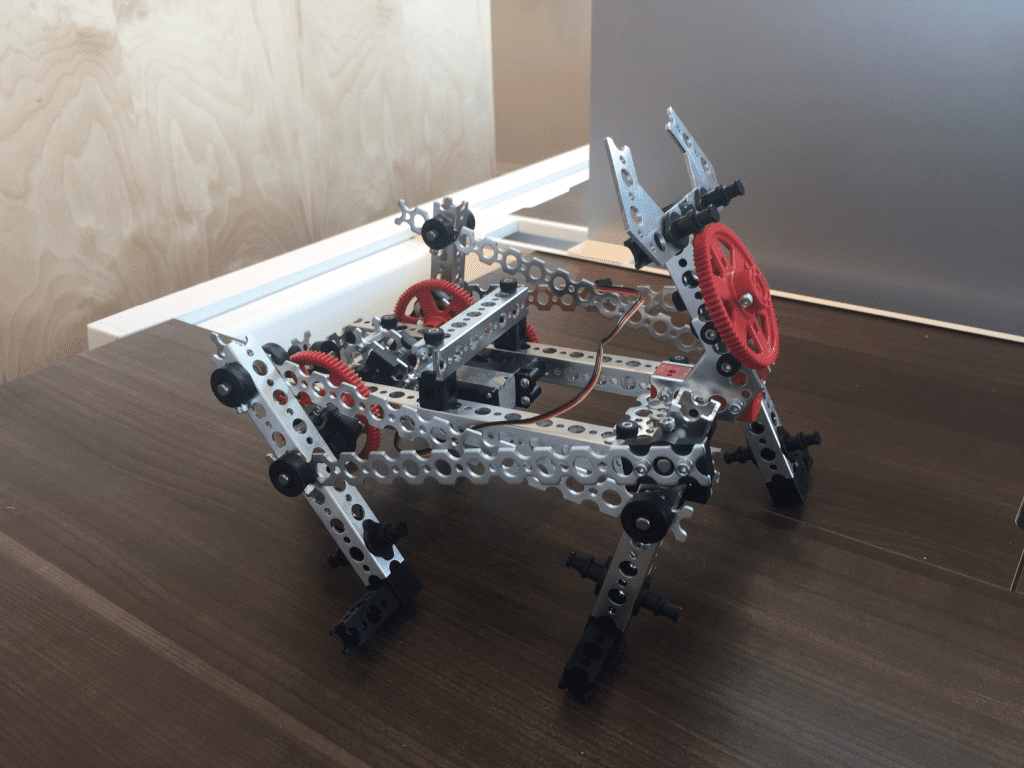
Our goal is to create an autonomous robot that walks forward unless the distance sensor detects an obstacle. When the robot encounters an obstacle, it should move backward. Create a mast that contains a distance sensor and two tri-color LEDs. Connect these components to the Hummingbird board.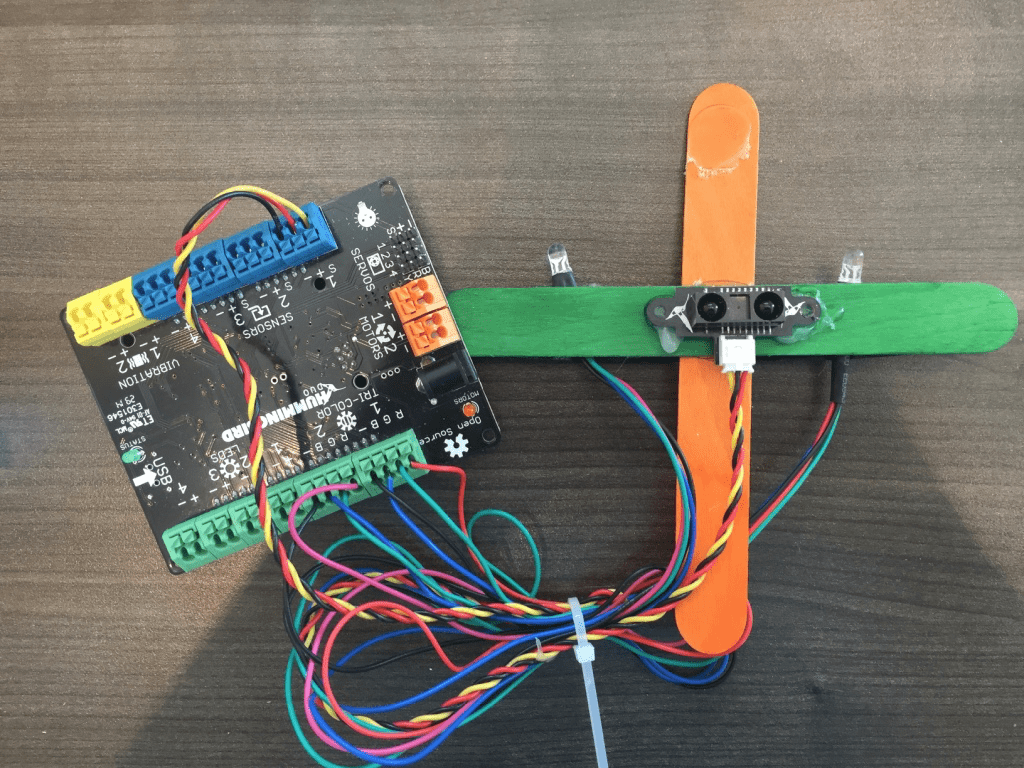
Use tape to attach the mast to the Walker Bot and plug the continuous rotation servo into port 1 on the Hummingbird board. Use a zip tie to bunch the cables so that they don’t get tangled in the linkages of the robot. The battery pack can be placed underneath the Hummingbird board.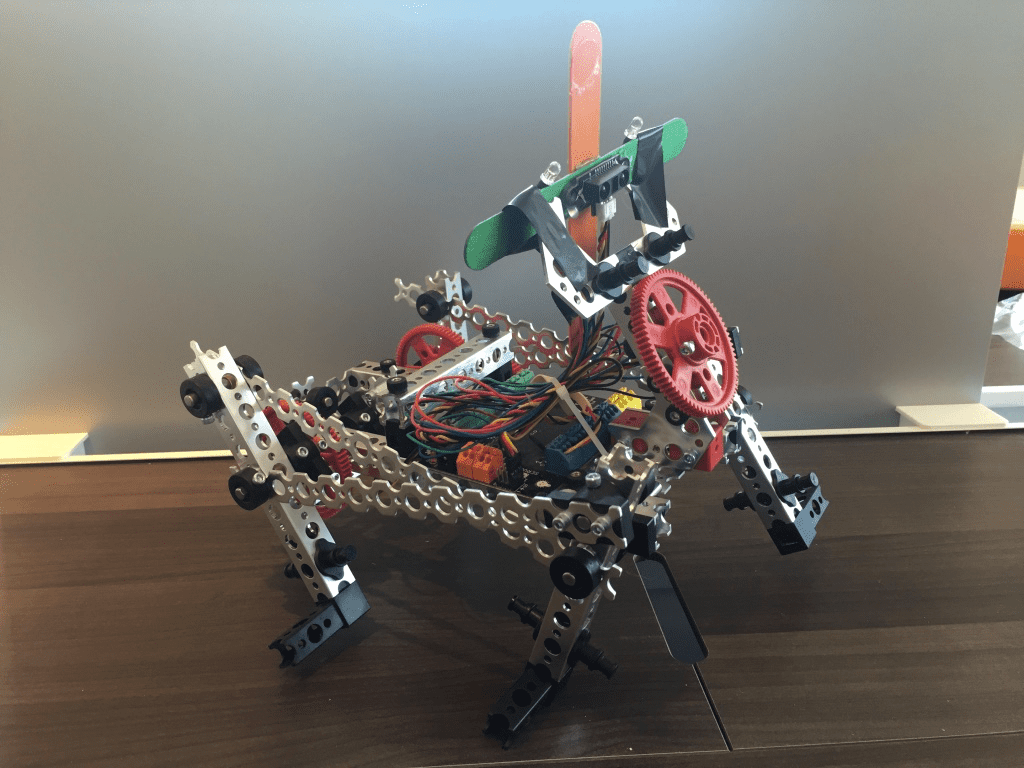
Programming the Walker Bot
Next, program the Walker Bot in Arduino. Declare a global variable to hold the threshold for the distance sensor. Within the setup() function, initiate a serial connection to print distance values to the screen. It is also a good idea to add a short delay to the setup() function.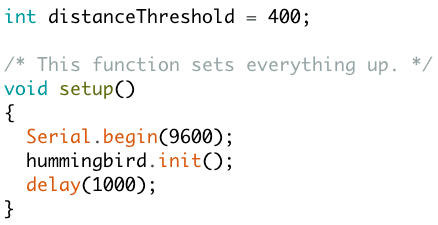
In the loop() function, print the value of the distance sensor to the serial monitor. Run the program as you move obstacles toward and away from the distance sensor. Choose a value for the distance threshold.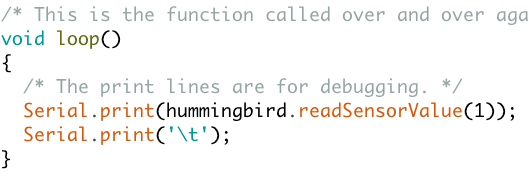
Next, modify the loop() function to include an if-else statement. When the distance sensor does not detect an obstacle, the robot should move forward. Otherwise, the robot should move backward. You can also turn the tri-color LEDs green when the robot is moving forward and red when it is moving backward.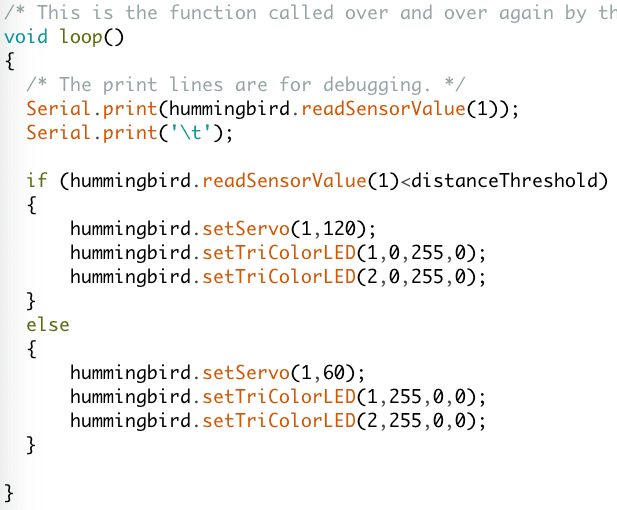
Have fun testing your robot, and then think about how you can modify it. Can you make it turn or move in a different way?
If you build something with TETRIX and the Hummingbird, let us know! You can reach us via email or on Twitter (@birdbraintech).